Mongo DB Connector
Objectives
This tutorial shows how to use an already developed Mongo DB Connector to define requests in a Bonita BPM business process.
Environment
Here is the environment used to write this tutorial.
- Windows 7
- Bonita Studio 6.2.6 installed (either Community or Subscription edition): http://www.bonitasoft.com/how-we-do-it/downloads
- Mongo DB Connector materials: https://github.com/Bonitasoft-Community/MongoDB-Connector
- Mongo DB v2.4.9: http://www.mongodb.org/downloads
It may be possible to use other versions and operating systems, but be aware that several steps in this tutorial may be specific to this particular configuration.
Step 1: Import the Mongo DB Connector
Import all the elements into Bonita BPM Studio to be able to use the Mondo DB Connector on a process.
Open Bonita BPM Studio
When the file has downloaded, double click on the executable file. Bonita BPM Studio will open.
Import the external JAR used by the Mongo DB Connector
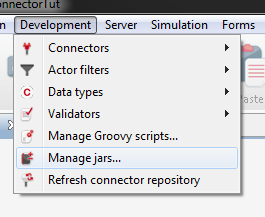
Go to the “Development” menu and click on “Manage jars...”
The “Manage jars” dialog appears and shows all the JAR files already imported. Click on “Import...”, select the “MongoDBConnectorExt.jar” file in your file system and click on “Open”.
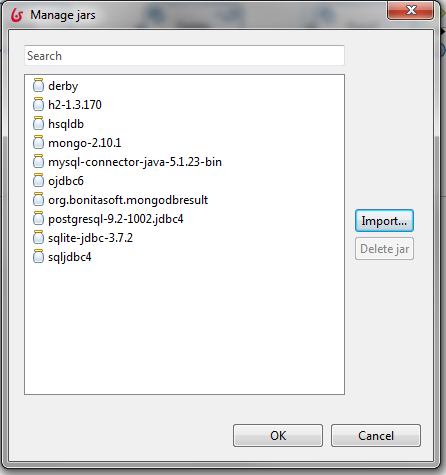
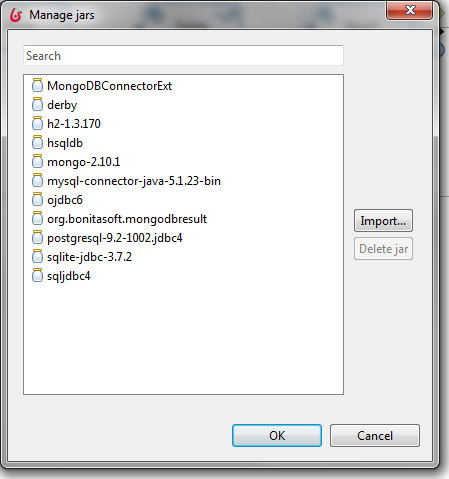
After a short wait, you see that the new imported JAR file is now present in the list of the “Manage jars” dialog. Press “OK” on this dialog to close it.
Import the Mongo DB Connector as a connector
Go to the “Development” menu, select “Connectors” and “Import connectors...”
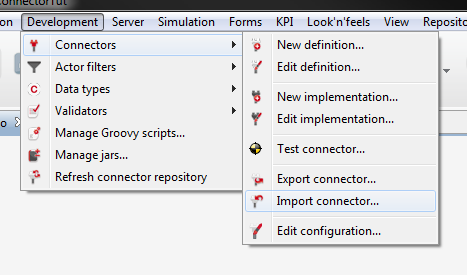
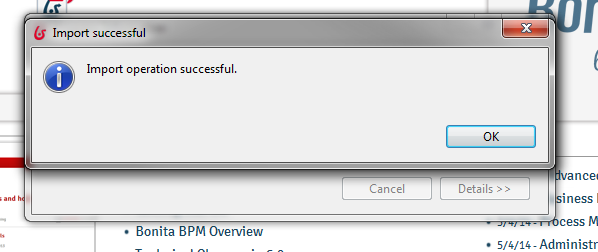
In the browser that appears, select the “MongoDBConnector-impl-1.0.0.zip” file and press “Open”. A new dialog will appear to confirm that the importation was successful.
Step 2: Define the business process
Create a new diagram and define the business process to use the Mongo DB Connector.
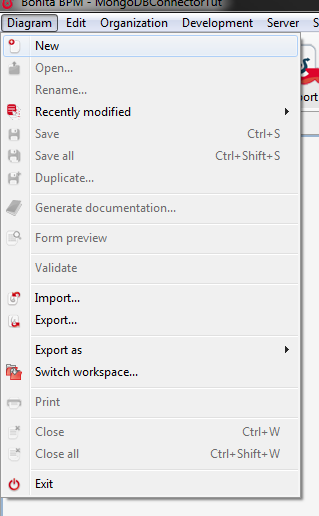
Create a new diagram
To create a new diagram, click on the “Diagram” menu and click on “New”.
Click on a blank part of the white board of the diagram, go to the “Diagram” tab of the “General” properties tab and click on “Edit...”
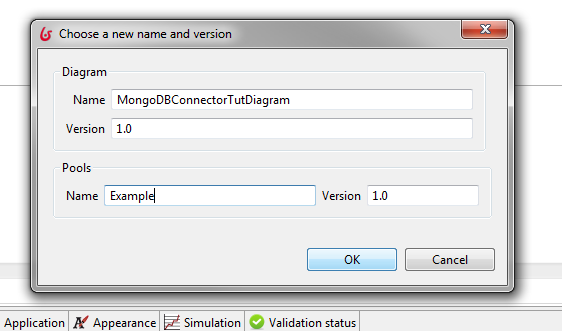
The “Choose a new name and version” dialog will appear. Set the name and version of the diagram and the business process (the pool) as you want. In this tutorial we use “MongoDBConnectorTutDiagram” and “Example” as the diagram and business process names and “1.0” as version.
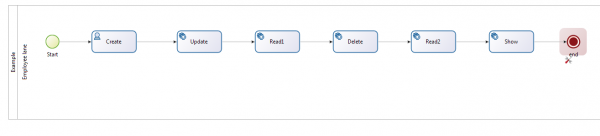
Define the flow of the business process
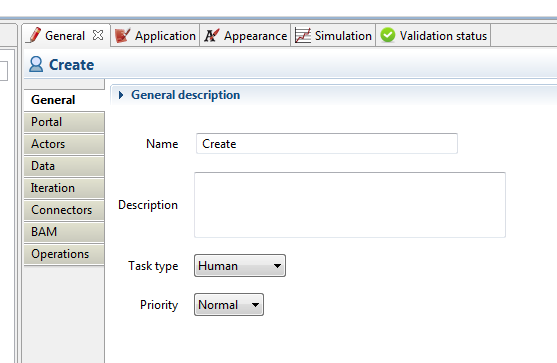
To define the flow, start by editing the name of the start event to “Start” and the existing step to “Create”. For that, click on the element on the white board and edit the “Name” field of the element in the “General” tab of the “General” properties tab.
Once this is done, complete the flow by adding tasks and an end event. To add a new element, click on the last element, drag and drop the circled square (to add a task) or the circle (to add an event) and select the specific element if required.
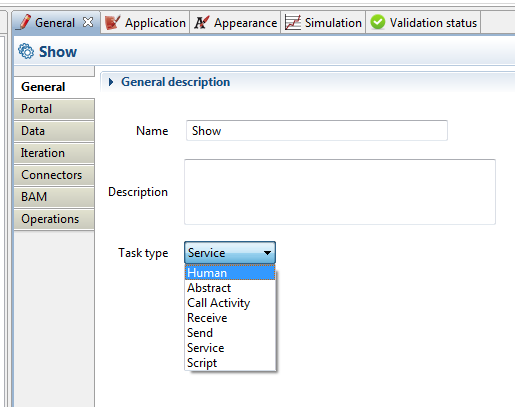
By default, the added tasks are “Service Task” but the “Show” task should be a “Human Task”. To change it, select the element, go to the “General” tab of the “General” properties tab and change the “Task type” to “Human”. The “Create” task should be a “Service Task”, so change it the same way.
Add data to the business process
To save the result of each Mongo DB Connector request, we define data on the business process scope. To do this, click on the business process, go to the “Data” tab of the “General” properties tab. From this panel, it is possible to add data clicking on “Add...”.
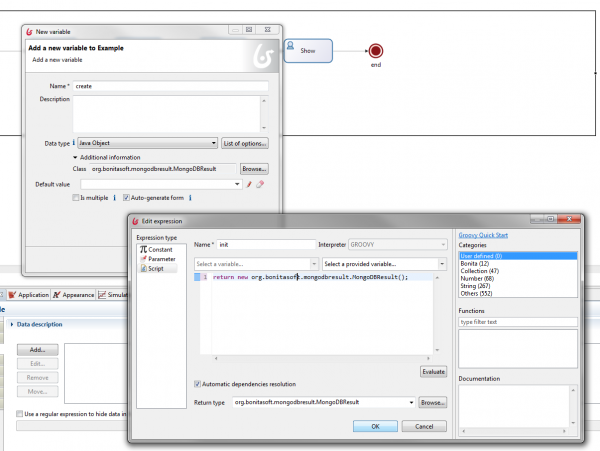
A “New variable” dialog appears, and use this to set the new data options. Start by putting the name, “create” for the first one, set the “Data type” to “Java Object”, click on “Browse...” and select “MongoDBResult” in the new dialog.
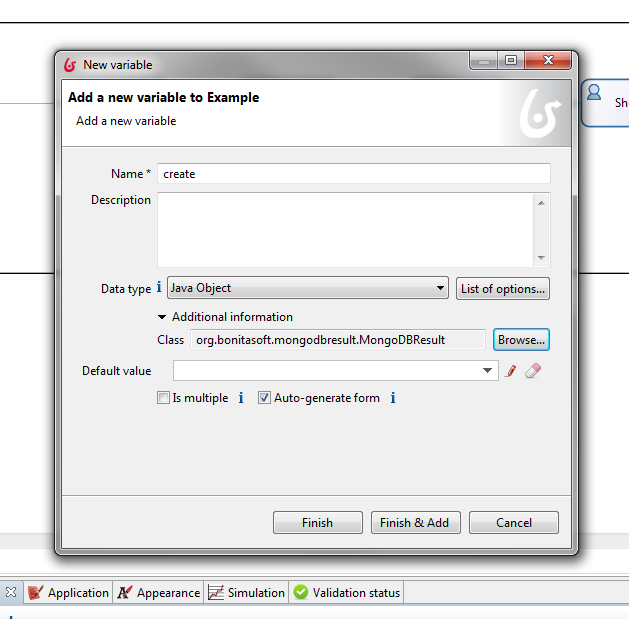
The default value should also be set. Click on the “Edit” icon, select “Script” on the left panel of the “Edit expression” dialog, enter “init” as a name, write “return new
org.bonitasoft.mongodbresult.MongoDBResult();” in the script content and click either on “Finish” to finish and exit the dialog, or on “Finish & Add” to finish and add another data definition.
Repeat this sequence to get the five variables required to get the results.

Set the form to summarize the case at the end
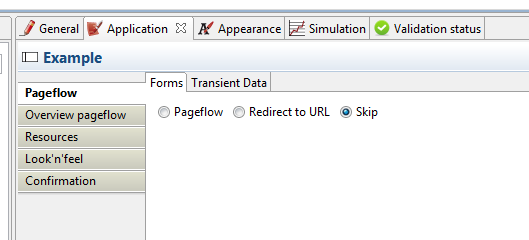
Click on the business process and go to “Pageflow” tab of the “Application” properties tab and select “Skip” instead of “Pageflow”.
Add a form in the last task of the business process to be able to summarize the case behavior before finishing it. To do this, select the “Show” task, go to the “Pageflow” tab of the “Application” properties tab and click on “Add...” On the “Add form...” dialog, click on “Finish”.
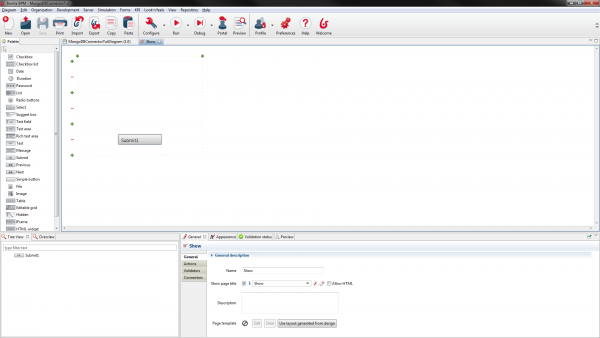
Then, add a “Text area” widget for each data we want to show (“create”, “update”, “read1”, “delete”, “read2”). To do this, drag and drop the “Text area” element from the “Palette” tab on the left side to a location on the form on the whiteboard and edit the “Name” and the “Show label” to match the data name in the “General” tab of the “General” properties tab.
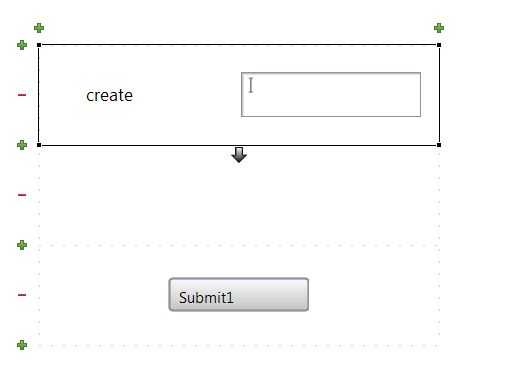
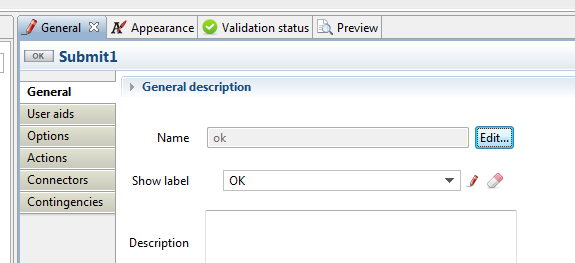
The “Submit” can also be changed to “OK” in the same way.
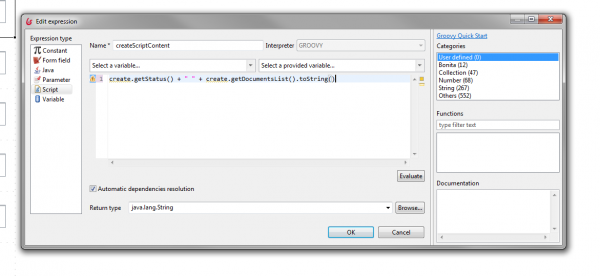
The last thing to do on this form is to set the initial data of the widgets to the result returned during the case execution. Click on the “Text area” widget, go to the “Data” tab of the “General” properties tab and click on the “edit” icon. The “Edit expression” dialog appears, select the “Script” tab on the left, enter the name of the script as “xxxScriptContent” and enter the content for the script “xxx.getStatus() + " " + xxx.getDocumentsList().toString()” with “xxx” the name of the data to be shown.
Add the Mongo DB Connector instances on the flow
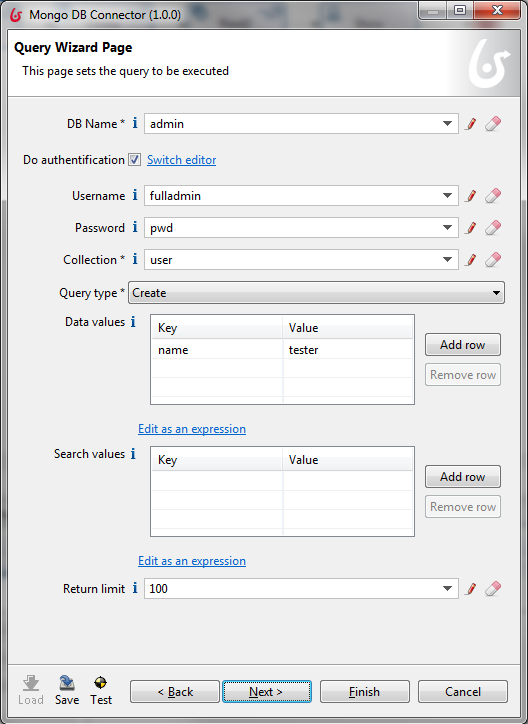
Now that the whole business process definition (flow and form) is done, add the connector instances on the flow. Before you can do this,it is necessary to have a Mongo DB server set with a collection and an admin user with all rights (read & write). In our case we have:
- a 2.10 Mongo version (we are not talking about the Mongo DB version here)
- a localhost server IP
- a 27017 serve port
- an “admin” DB name
- a “fulladmin” username
- a “pwd” password for the “fulladmin” username
- a “user” collection in the “admin” DB
- full rights on the “admin” DB for the ”user” collection for the “fulladmin” username
- one of the “user” collection fields is “name”
The following illustrations are based on the context described above. You can either use the same environment as ours, or edit the Mongo DB Connector requests according to your own context.
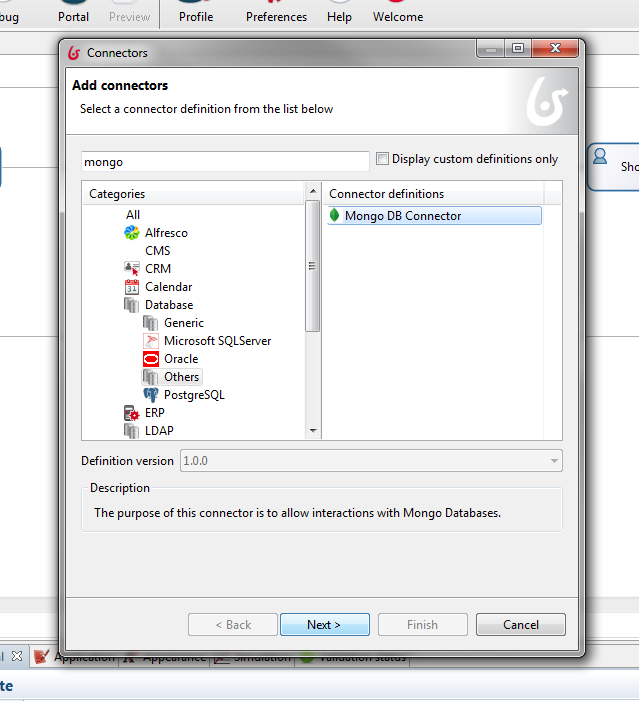
For each “Service Task”, select the task on the whiteboard, go to the “Connectors” tab of the “General” properties tab and click on “Add...” On the “Connectors” dialog, select the “Mongo DB Connector” and click on “Next”.
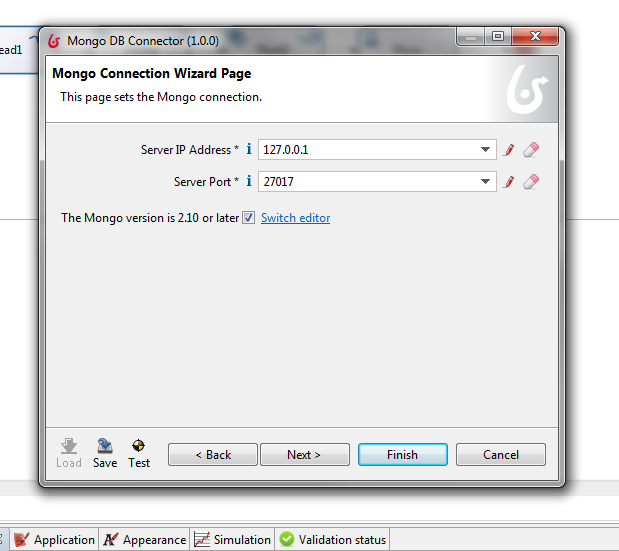
Enter the name of the data as connector “Name” and click on “Next” twice.

The first page of the wizard of the Mongo DB Connector appears. Enter the server information and click on “Next”.
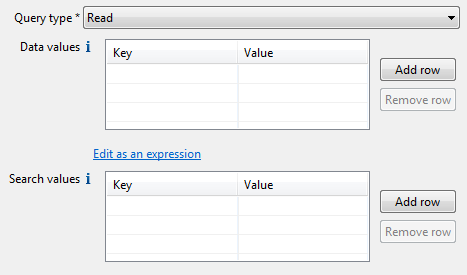
The second page of the wizard of the Mongo DB Connector opens. Enter the request information and click on “Next”.
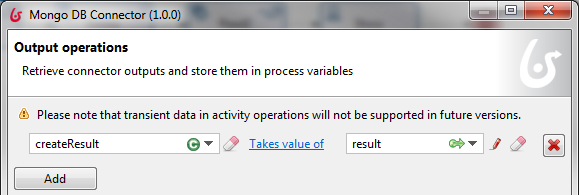
The results of the operations are shown. Write that the data of the process should be assigned to the value of the result of the request call of the Mongo DB Connector and click on “Finish”.
Step 3: Launch a case
This last step is to launch a case based on the process definition. Mongo DB Connector instances will be called.
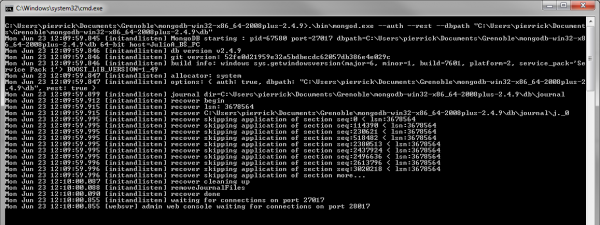
Launch the Mongo DB server
Before being able to launch a case, launch the Mongo DB server.
Launch a case from Bonita BPM Studio and show the result
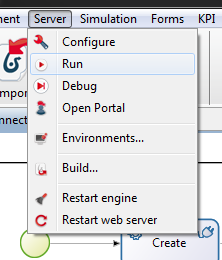
Everything is set. We can start a case. To do this, select the process on the whiteboard, click on “Run” in the “Server” menu.
Your default browser opens a new tab and after a short wait, you should see that the “Show” task is available.

This means that all of the Mongo DB requests have been done. The “Show” task will show the results.
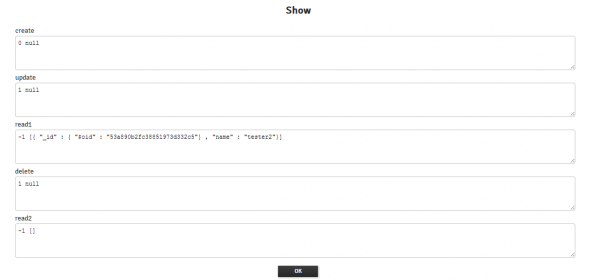
From the “Create” task, you should see that everything went right:
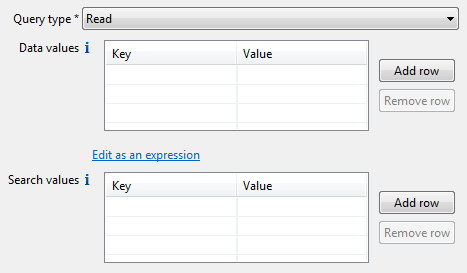
- For the “Create” task, nothing specific happens: 0 code.
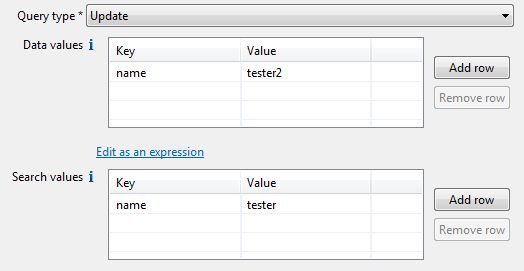
- For the “Update” task, one task has been edited: 1 code.
- For the “Read1” task, only the updated user with the “tester2” name is returned.
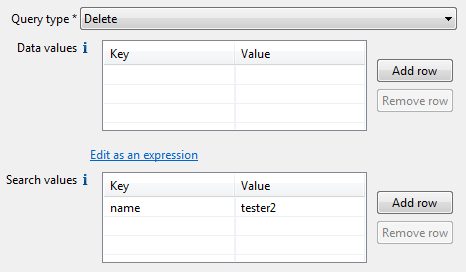
- For the “Delete” task, one task has been deleted: 1 code.
- For the “Read2” task, no hit is returned.
That's all folks!
If you have questions, please add a comment below. A usual, all resources are available on Bonitasoft's Community repository github. See links at the beginning of this tutorial.
Have fun with Bonita BPM and Mongo DB ;-)
Comments
Great job!
One question though : is it possible to use a replicaSet with this connector? How should I declare it?
The github project does not contain the jar "org.bonitasoft.mongodbresult.jar". Without this package, nothing works. Where can we find it ?
in the tutorial the read tasks return all fields in matching documents from MongoDB. We want to specify the fields to return in the matching documents . how can we do this !!
Is I need to change the connector code or add code to the script ?
The github project does not contain the jar "org.bonitasoft.mongodbresult.jar". Without this package, nothing works. Where can we find it ?