How to use "Save Draft" feature properly in your Forms
Component: Bonita | Version: 7.7+ | Edition: Subscription
Note: "Save Button" widget is available on Community Edition as well since Bonita 2021.1
Have you ever wondered how to use the "Save Draft" feature in your forms? Have you ever had any difficulties to make it work the way you want?
If it's the case then this little article is for you.
For those who don't know, the "Save Draft" feature is used to store data in the browser (LocalStorage). Then, whenever a user reloads a form (by hitting F5 or accessing the form another time) all the information saved gets automatically displayed again in the form. Finally, when the form is submitted all the daft data saved in the browser gets removed.
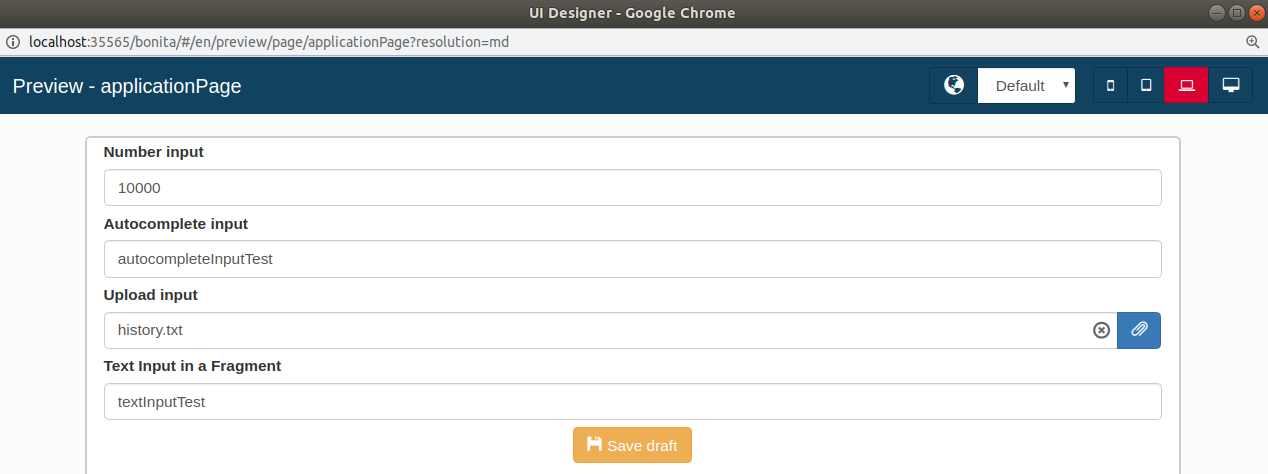
To explain how this feature could be implemented in a form. We are going to follow a simple example where we create an application page in the UI-Designer containing several fields, a fragment containing a field and finally a "Save Draft" button.
1. First, we need to create in the form a Json variable that will be linked to the "Save Draft" button.
For the sake of the example, we are going to call it jsonVarContainer of type Json and having {} as a value.
This variable will contain all the fields that will be saved and retrieved from and into the form.
FYI to see what has been saved into the browser (chrome for example). Select the three dots button > More Tools > Developer Tools (or press Ctrl+Shift+I) then, from the panel that opens at the bottom of your screen, select in "Application" tab "Local Storage" and look for the key starting with "bonita-form".
2. Next, we need to create a "Save draft" button and link it the jsonVarContainer that we have created earlier.
To do this we need to add jsonVarContainer in the value field of the "Save draft" button.
3. Then, for each field, text, number, upload the value has to be set with the name of the Json variable that we have already created. Then, the name of the field. Example : jsonVarContainer.upload, jsonVarContainer.number or jsonVarContainer.autocomplete.
4. Finally, for a field embedded in a fragment we need to :
4-1. Create a variable that its data will be exposed to the page. For this, we need to create a variable in the fragment and select yes to "Expose fragment data to page?".
4-2. The name of this variable has to be set in the "value" parameter of the field (text for example).
4-3. Finally, on the page, we need to specify the "Bindable fragment data" of the fragment. For our example, it will be "jsonVarContainer.text" (since we have named our variable text).
You can find on the following link the example used on this little article. Please feel free to download it to visualize the steps mentioned above :
https://drive.google.com/file/d/1AHujmSfbj4nc_2FmupeqF4i14VinMLj4/view?usp=sharing
I hope this little article was clear and has explained correctly the process of using "Save draft" button.
Please let me know if you have any questions or need further information.
Comments
is this only in the Enterprise edition ?
is this only in the Enterprise edition ?
How is the data temporarily saved in the browser, if I access it from another computer or another browser, will the data continue to be saved?
What happens if you already bound your data fields to contract?
What happens if you already bound your data fields to contract?