How to open a modal container with other than the Button widget
Component: UI Designer | Version: 7.8+
Purpose of this article
Starting with the version 7.8, the UI Designer now includes a Modal container among the out-of-the-box widgets. As the documentation explains, the modal container can be used to create a pop-in window; it can then be opened with a button by choosing Open modal in the button's Actions property.
However, you may wish to be able to open your modal container with a widget other than a Button. Well, here is how you may easily manage to do so.
In the following example we will show you how to open a modal container when selecting a row in a table widget:
Customise the Table widget
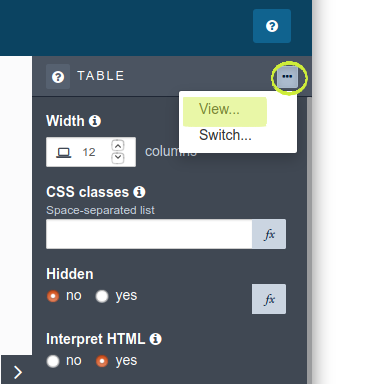
1. In a dummy page, add a Table widget, then select the widget and click on the "..." icon right beside the widget title on the top right side of the page.
2. In the roll-down menu, choose "View...". This will open the widget editor.
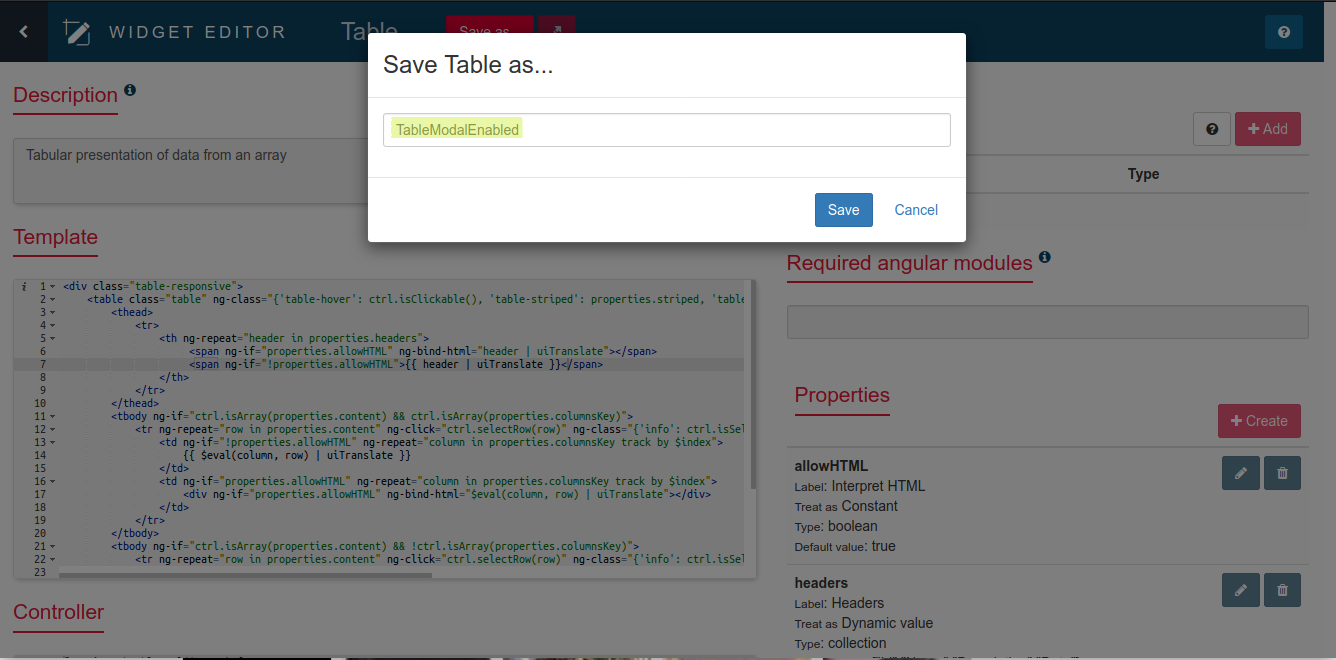
3. In order to be able to edit the widget, though, you must save it first with a new name. So click on "Save as..." and provide a new name. (e.g. TableModalEnabled)
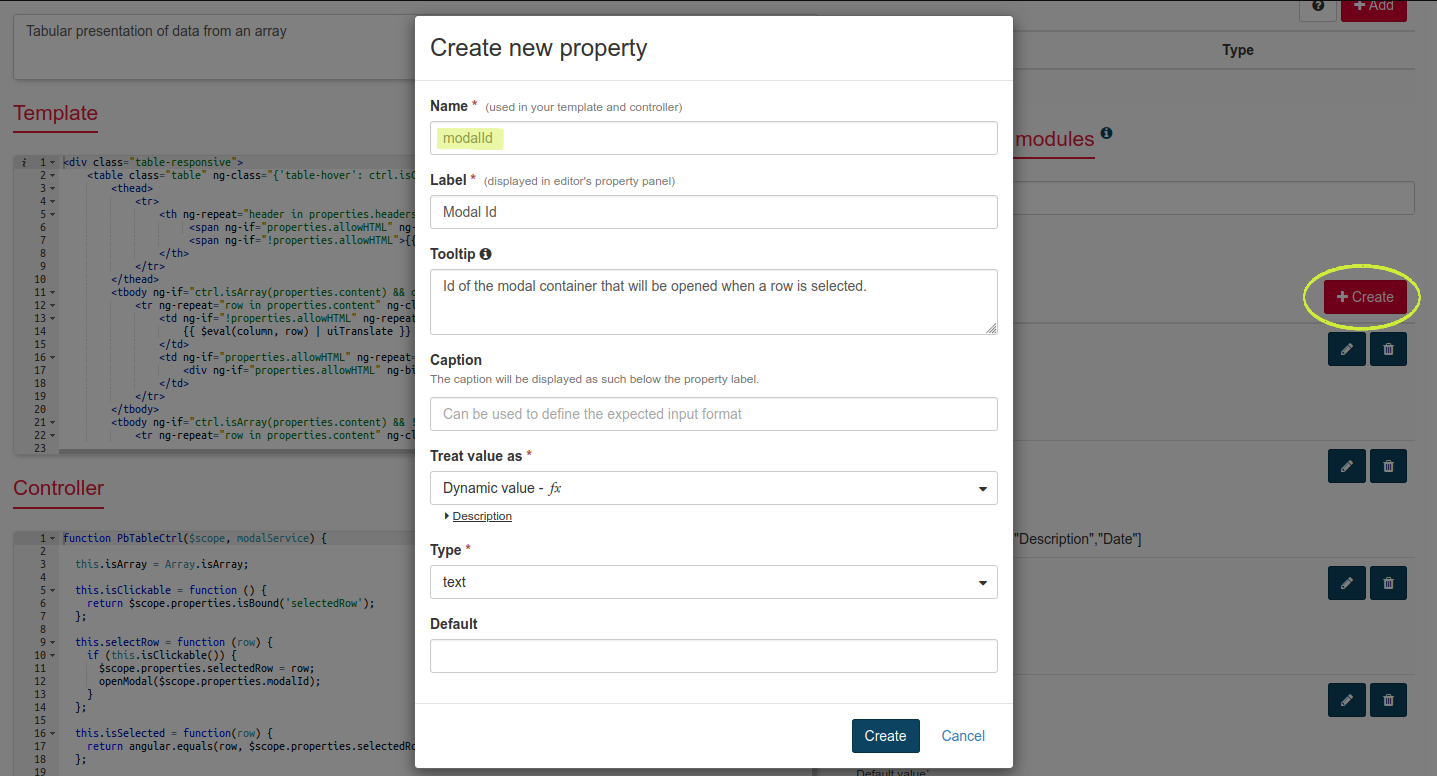
4. Create a new property (e.g. modalId) to be able to specify the id of the modal container to open.
5. Add the parameter modalService in the widget's Controller function:
 function PbTableCtrl($scope, modalService) {
  ...
6. In the Controller, define a new function (e.g. openModal) to open a modal window:
  function openModal(modalId) {
    modalService.open(modalId);
  }
7. In the Controller, inside the "action" function that should trigger the opening of the modal (this.selectRow), call the new function to open the modal:
  this.selectRow = function (row) {
    if (this.isClickable()) {
      $scope.properties.selectedRow = row;
      openModal($scope.properties.modalId);
    }
  };
8. This is what the Controller will look like:
function PbTableCtrl($scope, modalService) {

  this.isArray = Array.isArray;

  this.isClickable = function () {
    return $scope.properties.isBound('selectedRow');
  };

  this.selectRow = function (row) {
    if (this.isClickable()) {
      $scope.properties.selectedRow = row;
      openModal($scope.properties.modalId);
    }
  };

  this.isSelected = function(row) {
    return angular.equals(row, $scope.properties.selectedRow);
  };

  function openModal(modalId) {
    modalService.open(modalId);
  }

}
9. Save all the changes made to the widget.
Use the Table widget to open your modal container in your form/page
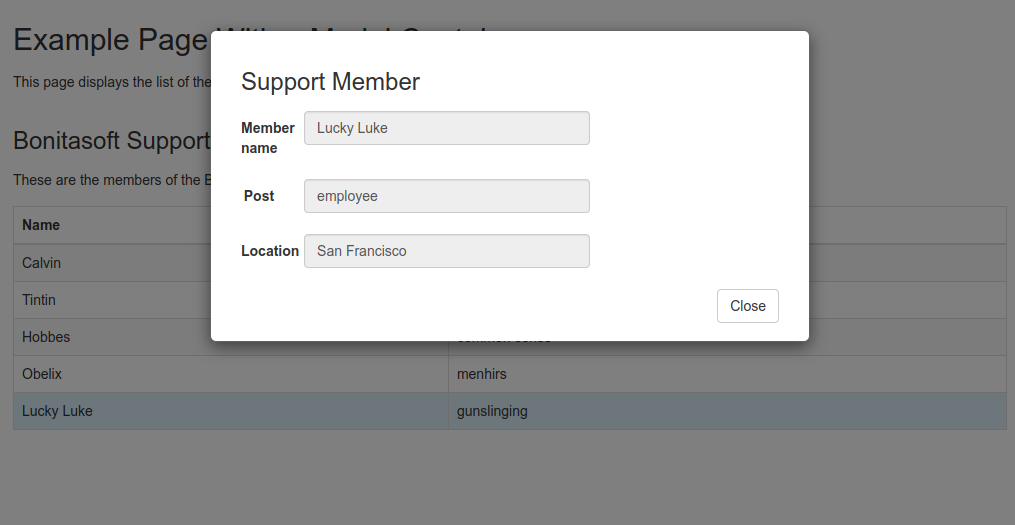
We will create a modal to display additional information for the selected member of the Support Members list.
1. In your form or page:
-
create a variable that will hold the list of Support Members. (e.g. supportTeam).
(This variable will most likely be populated dynamically by some query or external API call; but for the sake of simplicity of the example, we will use a hardcoded list) e.g.:
[
    {
        "name": "Calvin",
        "jobtitle": "manager",
        "location": "Grenoble",
        "expertise": "cart-riding"
    },
    {
        "name": "Tintin",
        "jobtitle": "employee",
        "location": "Grenoble",
        "expertise": "moon trips"
    },
    {
        "name": "Hobbes",
        "jobtitle": "employee",
        "location": "San Francisco",
        "expertise": "common sense"
    },
    {
        "name": "Obelix",
        "jobtitle": "employee",
        "location": "Grenoble",
        "expertise": "menhirs"
    },
    {
        "name": "Lucky Luke",
        "jobtitle": "employee",
        "location": "San Francisco",
        "expertise": "gunslinging"
    }
]
-
create an empty JSON variable that will hold the selected Support Member. (e.g. selectedSupportMember)
2. In your form or page, add a Modal container widget. Select the widget and set a unique ID in its Modal Id property. (e.g. supportMemberModal)
3. Inside the Modal container:
- add an Input widget for each member information you wish to display. e.g.:
- Member name: selectedSupportMember.name
- Post: selectedSupportMember.jobtitle
- Location: selectedSupportMember.location
- add a Close Button widget to close the Modal window, and choose Close modal in the Action property.
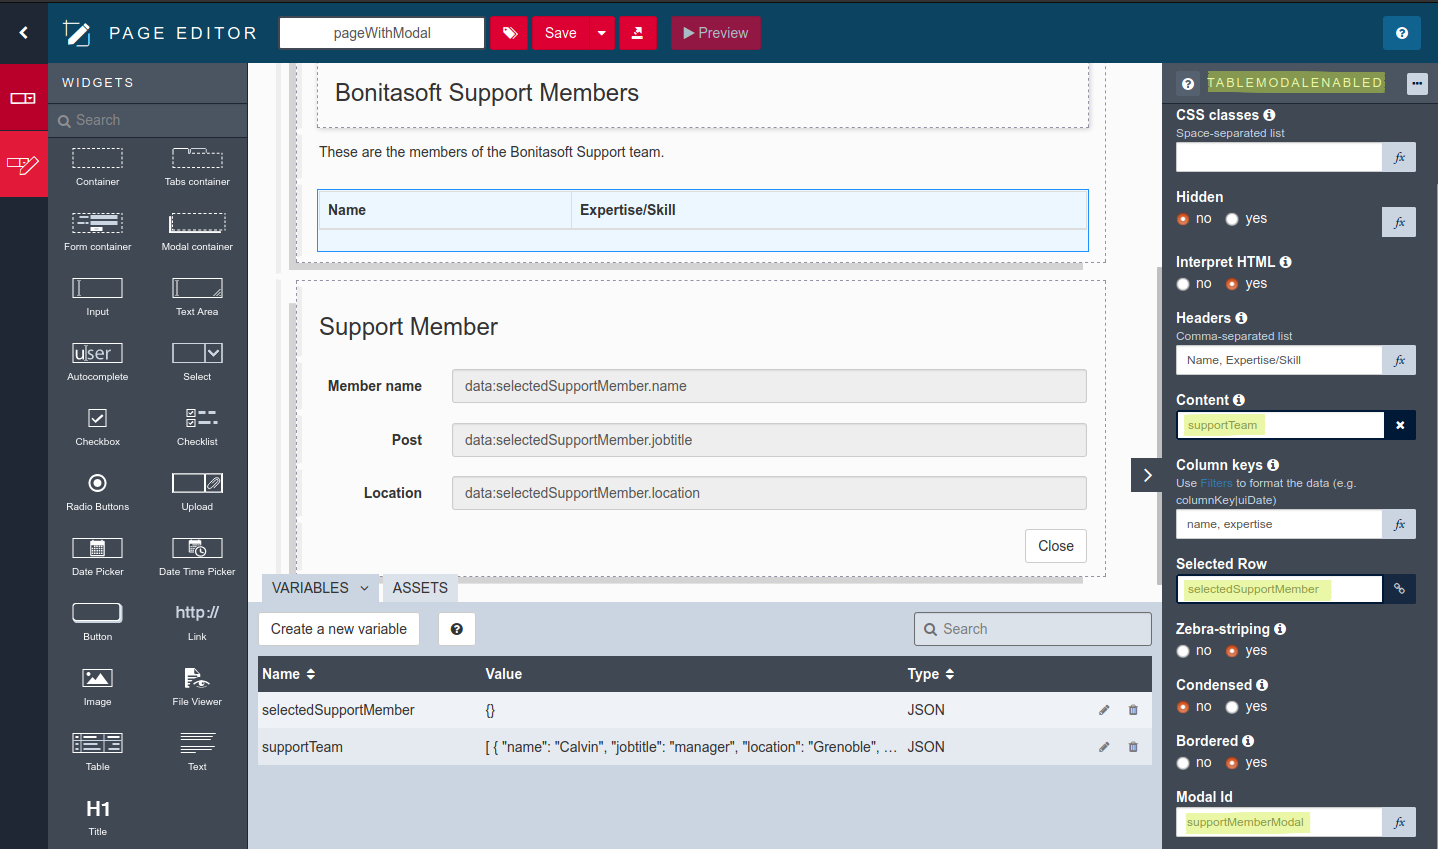
4. In your form or page, add a TableModalEnabled custom widget. Select the widget and:
- set the ID of the modal container in its Modal Id property (e.g. supportMemberModal)
- set the variable that will hold the selected Support Member in its Selected Row property (e.g. selectedSupportMember)
- set the variable that holds the list of Support Members in its Content property (e.g. supportTeam)
- set the Column keys for the data to display (e.g. name, expertise) and the corresponding Headers (e.g. Name, Expertise/Skill)
5. Save the changes made to your form or page.
6. Now, when a member of the Support Team is selected in the table, a modal window will be opened displaying some additional information of that member.
Comments
Hello, that's awesome! Could you provide this custom widget in the community, in the contribution section?
Thank you!
Good