Building a RESTful API with Node.js and Express
A frontend guy built a backend REST API with Node.js & Express

Introduction
After gaining a few years of experience in front-end development, I am now a front-end developer in the Bonita Runtime team at Bonitasoft. This team is a part of the R&D department, where most of the developers in the team are specialized in back-end, and some are full-stack developers. As the lone front-end developer in the team, I always depended on my teammates to build the APIs, the backend of the apps I was working on. And often when other developers were talking about the implementation of new features, and new APIs, I was unable to contribute. I decided to learn on my own how to build a RESTful API and start learning things to enhance my area of expertise.
All the APIs on the Bonita platform are developed in JAVA which is a backend programming language, so I have chosen Node.js and Express to build my first API. As a front-end developer with experience in HTML5, CSS3, Javascript, and its frameworks, I found Node.js and Express more convenient to me at this stage, in terms of learning and grasping the basics of it quickly. Building an API is a challenging job that makes me feel that I am moving out of my comfort zone. In this article, I am going to share how I built my first REST API with Node.js and Express, and also explain how to document it with SwaggerUI.
As Bonitasoft offers a process automation platform to automate the business processes, I will show how I built a process API that we normally use at work. From the process API, we will retrieve a list of processes, get a process by its ID, and also get processes by using filter queries. (You of course can define your data as you wish.)
Prerequisite
Before getting in too deep, I assume that you already have the following:
- Basic knowledge of Javascript.
- A code editor (I’m using VS Code)
- Node installed on your computer
- Some basic knowledge on web client-server relationship
Building a RESTful API with Node.js and Express
Environment setup
Initialize Node Package Manager (NPM)
Setting up the environment of a project is an essential part of the process. Since we are going to build an API with Node.js and Express, you need to have Node.js installed. Once Node is installed, initialize the project by using the “npm init” command.
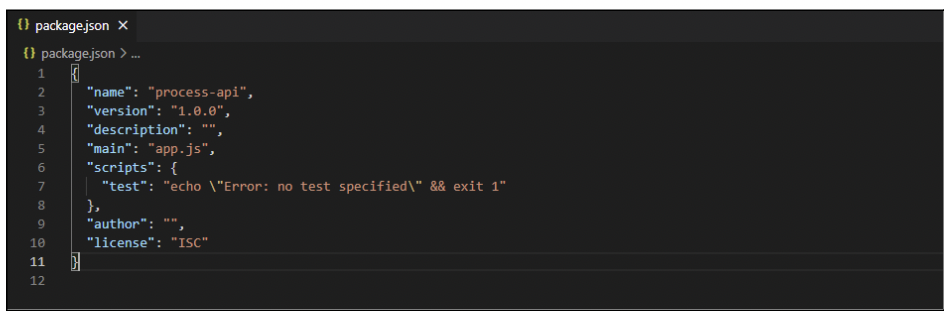
The npm init command allows us to set up a new or existing npm package that will ask a few questions to set up some essential metadata for the project, such as name, description, versions, gateway, scripts, dependencies, etc. It then writes a package.json containing this metadata.
A package.json file includes the packages and applications it depends on, and defines the functional attributes of a project that npm uses to run the scripts, install the dependencies, and define the entry point to the project. It is also known as the heart of a Node project. There is more detailed information about it here. Inside package.json, “main” is the gateway (entrypoint) of an application, This means that when we execute the application, the file defined as a gateway will be executed first. Since I’ve defined ‘app.js’ as an entrypoint of the application, all the business logic will be defined inside the app.js file. You can set the gateway as you wish (eg. index.js).
-
At the very beginning, create a project folder somewhere and open it into the code editor.
-
Open the terminal inside the code editor and run the command npm init.
|
npm init |
-
Select the default options (by pressing the enter key) to complete the setup.
-
A file named “package.json” has been created:
Install Express
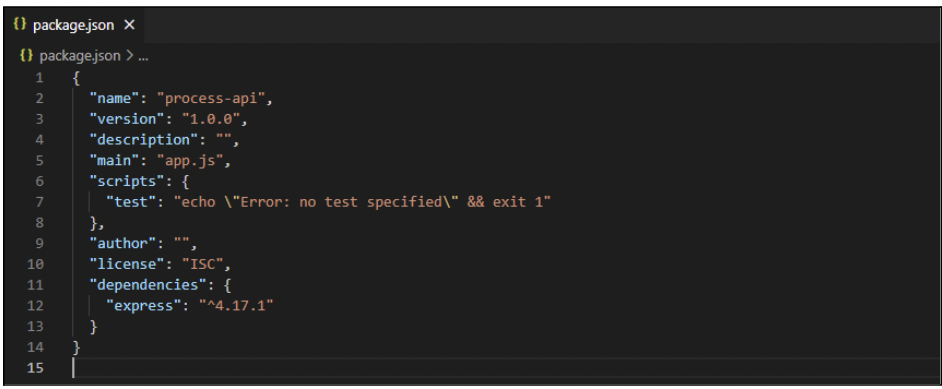
Express.js is a backend web application framework for Node.js designed to provide a robust set of features to build single-page, multi-pages, hybrid web applications, and APIs. Express can be installed by NPM as a dependency of an individual express web application. By using express in this project, we specify the HTTP methods and routes that refer to the application’s endpoints (URIs) that respond to the client requests.
-
To install the Express dependency, run the command given below.
|
npm install express --save |
-
In the image below, we can see that Express is added as one of the dependencies.
Building a web server
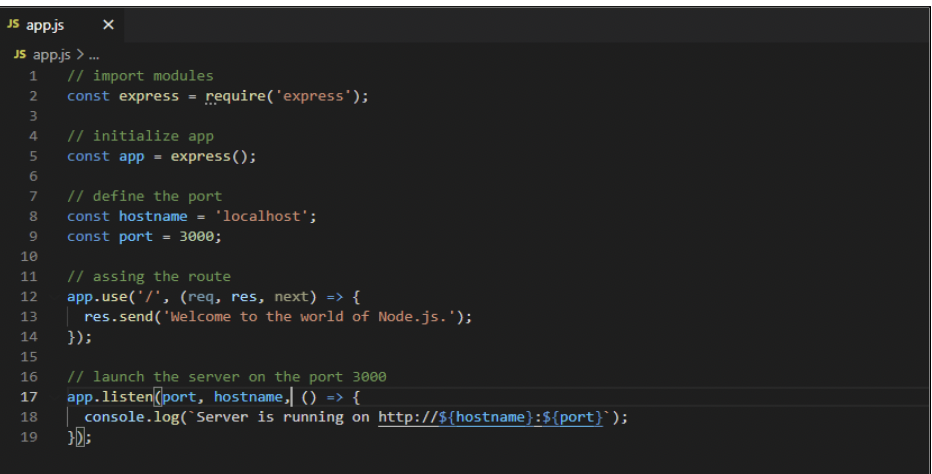
Once we have installed express dependency, it’s time to build the web server. As we have defined the app.js file as an entrypoint of the application, create a file named app.js at the root of the project. The app.js is a file where we import the required modules, initialize an application, create a route, and define the port where our server will be executed.
-
Inside the app.js file, import an express module, initialize an app, define the port, and create a route to show a welcome message in the browser.
Installing Nodemon
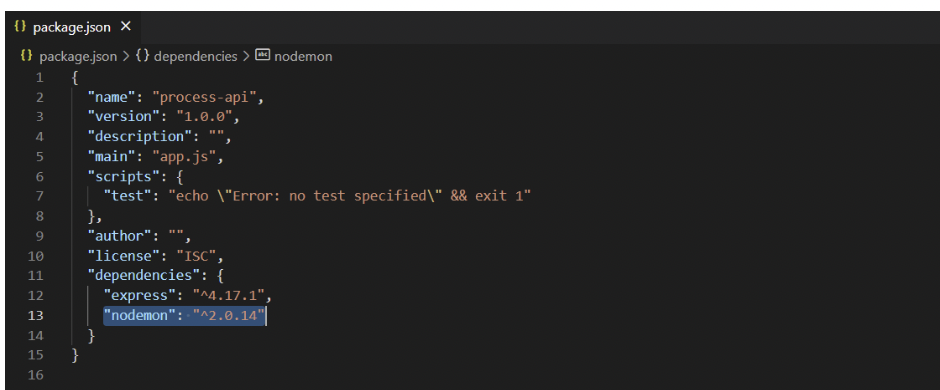
Nodemon is a utility that monitors the changes in the source and restarts the server automatically. This means that if we make any changes in the code, we do not need to stop and start the server each time.
-
Inside the terminal, run the command given below.
|
npm install nodemon --save |
Launch the web server
-
Before launching the server, add the launching script inside the package.json file. Add the start script in the scripts object inside package.json as shown in the image below.
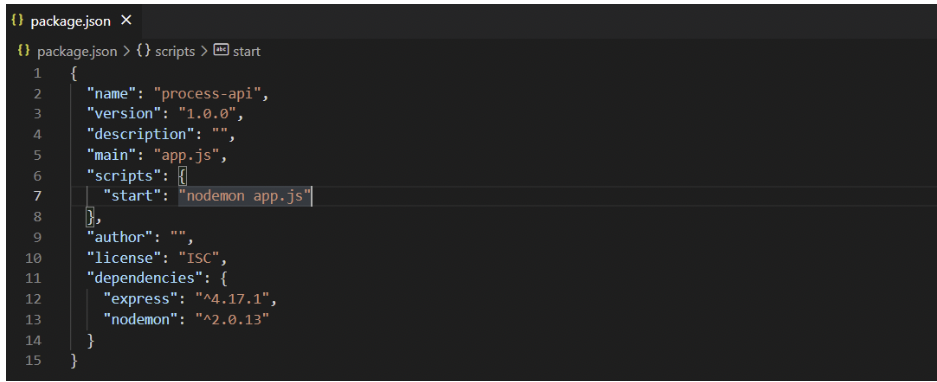
-
Run the command nodemon start.
|
nodemon start |
-
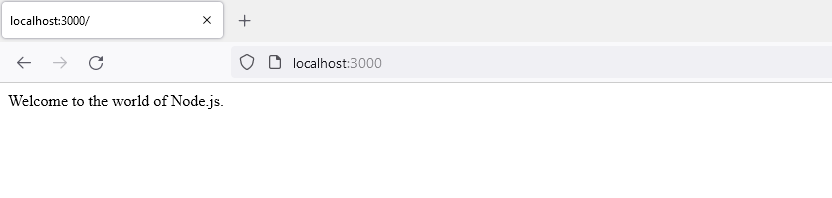
We can now see a message saying “Server is running on http://localhost:3000” in the console.
-
We can also see the welcome message if we open a browser and visit the URL http://localhost:3000.
Prepare data
The data is the information that we fetch from the server and to display on the client-side by making an API call using the HTTP methods. In this step, we are going to create dummy process data which we will fetch through an API call later.
-
Inside the project root folder, create a folder named apis.
-
Inside the apis folder, create a js file named processes.js.
-
Inside the processes.js file, define the process information as shown below.

Import modules
Before we start defining the servers, routes, and so on, we need to import all the required modules which are essential for our application. Therefore we are going to import the data we prepared in the previous step.
-
In app.js, import the process data module.
|
// import modules const express = require('express'); const processes = require('./apis/processes'); |
Set up a route
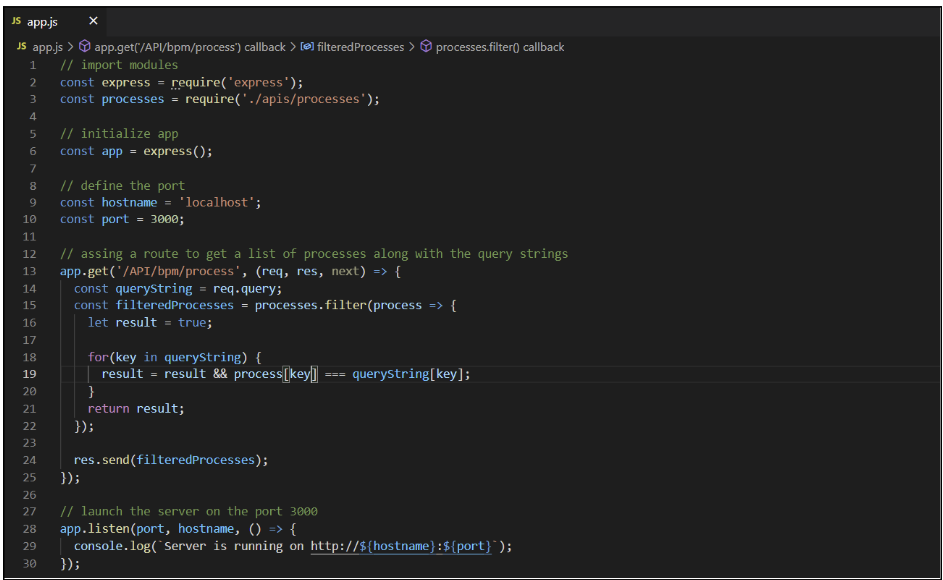
A route refers to an application endpoint which responds to client requests. Since we have already imported Express modules, we can use Express to get the list of processes by using the get() method, which responds to the client whenever the HTTP GET request occurs. In this case, we will create a route to get a list of all processes available, and a list of processes with filter query strings, if they have them. In the example below, I’ve assigned the route to ‘/API/bpm/process’, but you can define it the way you want (eg.: ‘/abc’, or ‘/abc/xyz’, or ‘/abc/xyz/123’).
-
In app.js, create a route to get the list of processes as shown in the image below.
Fetch the list of processes
As we have the server running, we can call localhost:3000/API/bpm/process to see how it works. As a result, we can see a list of processes displayed on the browser as shown in the image below.
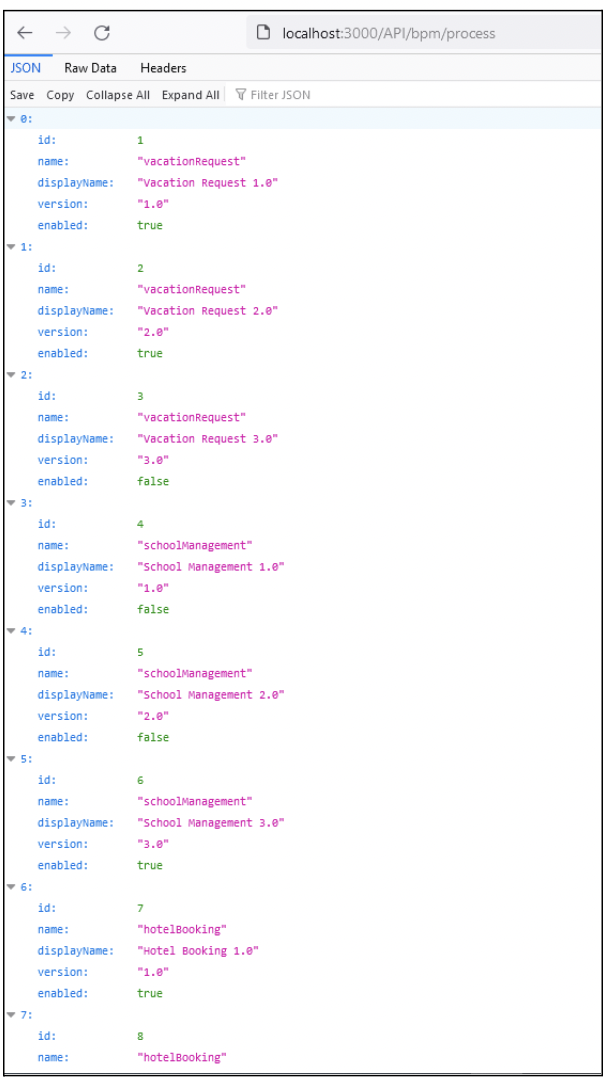
NB: I have installed a JSON prettify extension to my browser, but you can get the same result in raw JSON format.
Once we get the list of processes by visiting localhost:3000/API/bpm/process, we can filter the list by passing a query parameter. As we’ve defined string as the type for name, displayName, and version, we can use those keys as query strings. For example: “?name=vacationRequest”.
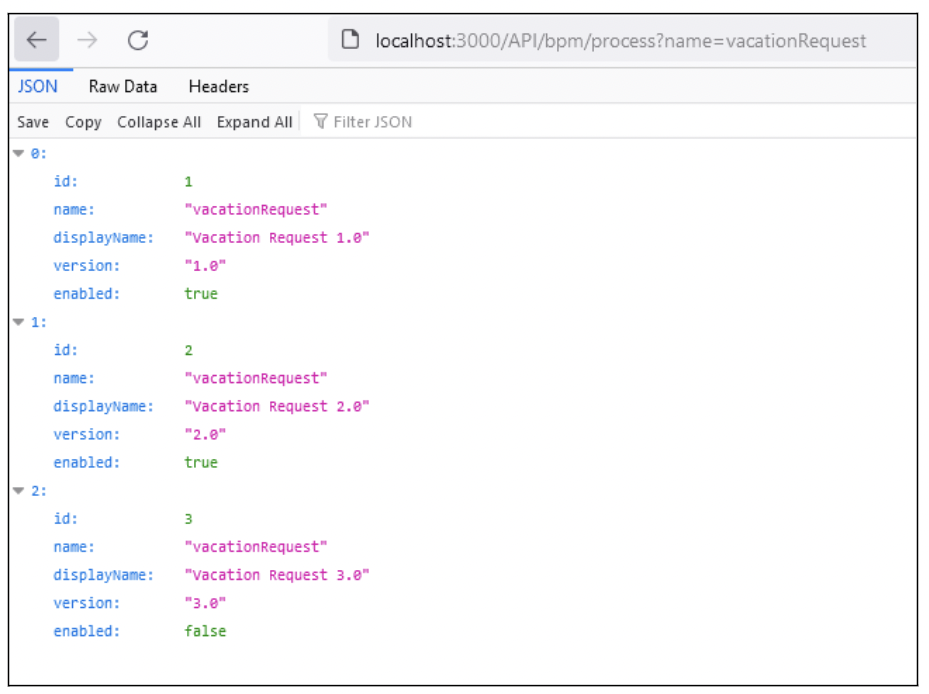
NB: We can pass more than one parameter to the query string. For example; “?name=vacationRequest&version=2.0”.
Set up a route to get a process by ID
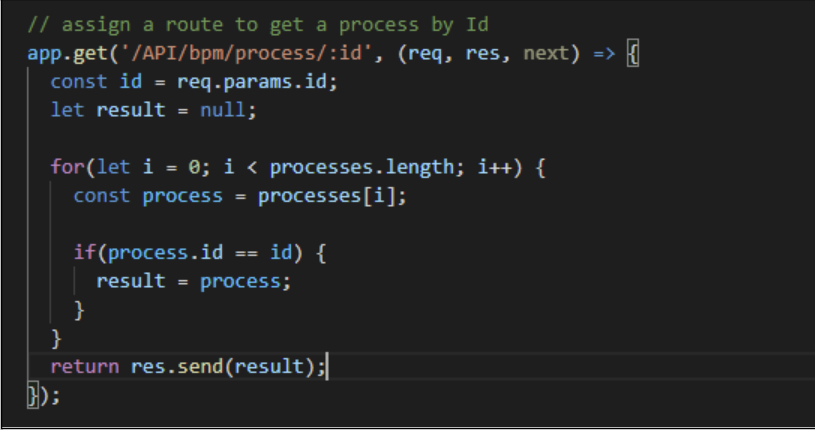
Here, we are going to define a route that refers to an endpoint to get a specific process by its id through the get() method. Inside the get() method, we compare if the id of the process from our data and the id provided in the request parameter matches, and then sends the response with the matched result.
-
In app.js, assign the route to get a process by id as shown below.
Fetch a process by ID
As in the previous step, we can call for a specific process by passing its id (“localhost:3000/API/bpm/process/3”) to the URL.
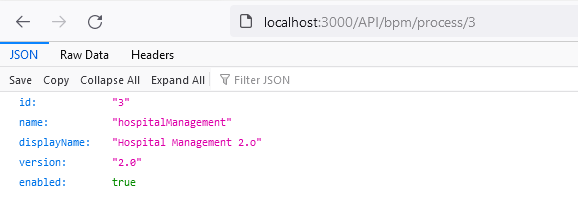
Congratulations, we have just implemented a REST API to get a list of all items available, a list of items that match the query strings, and an item by id.

Document and visualize a Node.js REST API with Swagger UI
Introduction
As a front-end developer, I always struggled to get the information I needed about REST APIs. After endless hours learning about our API-driven development projects, researching, and consulting with my manager, I decided on Swagger as a solution to help me and other front-end developers find useful information about APIS.
Swagger UI is a widely used tool to design, build, test, visualize, and interact with APIs. The user-friendly interface of Swagger UI provides detailed information about the API such as; definition, paths, schemas, parameters, responses, etc. made it easy for me to understand. Here, I will explain how we use Swagger UI to document and visualize the REST API we created previously.
Environment setup
To document this API with Swagger, install the dependencies required.
-
In the terminal, run the following command.
|
npm install swagger-ui-express --save |
-
In the package.json file, we can now see a dependency for swagger-ui-express.
Document the API
As we have installed the dependencies, we need to document our API. I will break it down.
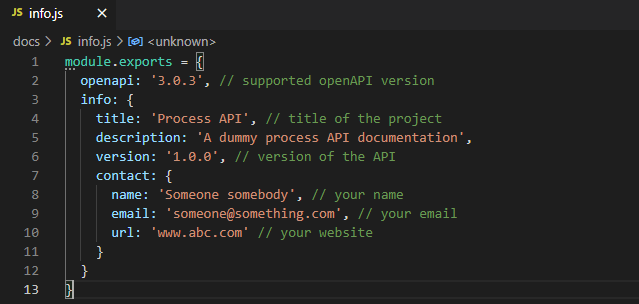
i. General information:
This section contains information about the project. For example, the supported OpenAPI version, general information about the project such as title, description, version, contacts, license information, etc.
Define the general information
-
Create a folder named docs at the root of the project.
-
Inside the docs folder, create a file called info.js and define the general information as shown below.
Import modules and create the route
-
Open the app.js file and import the ‘swagger-ui-express’ module, and the general details that we defined above.
-
After importing the modules, create a route for the documentation by adding the following code.
|
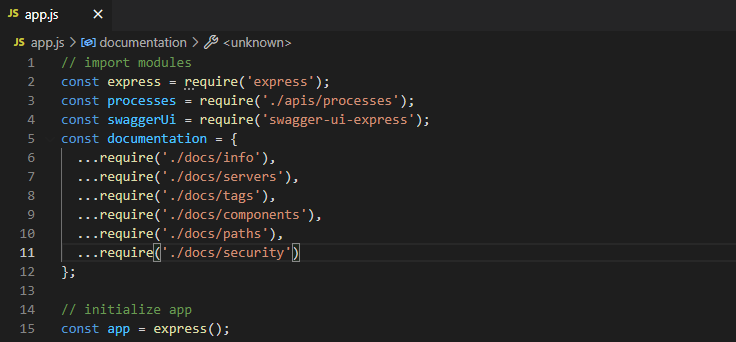
// import modules const swaggerUi = require('swagger-ui-express'); const documentation = require('./docs/info');
// assign a route for documentation app.use('/api-docs', swaggerUi.serve, swaggerUi.setup(documentation)); |
Test
-
It’s time to test the documentation. Execute the nodemon start command (if the server is stopped) and visit the URL ‘localhost:3000/api-docs’. You will see that all the information we declared inside the docs>info.js appears in the browser.

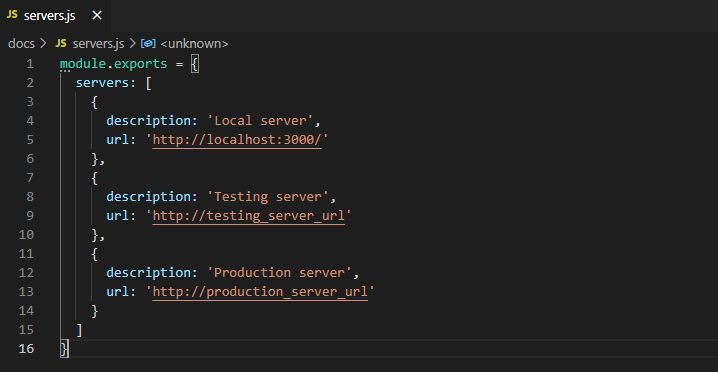
ii. Define servers:
Definine the servers that will operate depending on the current environment of the API. The API operates on the local server when it is in the development environment, and on the test server when it is in the test environment. Similarly, when it is on the production server, it operates in the production environment.
-
Inside the docs folder, create a file called servers.js and define the servers as shown below.
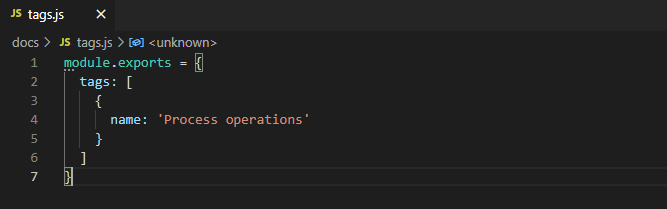
iii. Create Tags:
Tags are useful to differentiate among operations. This helps group the endpoints. Since we are dealing only with processes, we will create a tag for the process operations.
-
Inside the docs folder, create a file called tags.js and define the tags as shown below.
iv. Create components:
A component is a container for various reusable definitions. Components are composed of various definitions grouped by schemas, parameters, securitySchemes, requestBodies, headers, links, examples, etc. Since our API is simple and most of the definitions are optional, I am using only the schemas and securitySchemes in this example.
-
Inside the docs folder, create a file called components.js and define it as shown below.
module.exports = {
components: {
schemas: {
id: {
type: 'integer',
description: 'Process id',
example: '1'
},
name: {
type: 'string',
description: 'Process name',
example: 'vacationRequest'
},
displayName: {
type: 'string',
description: 'Process display name',
example: 'Vacation Request 2.0'
},
version: {
type: 'string',
description: 'Process version',
example: '1.0'
},
enabled: {
type: 'boolean',
description: 'Process state',
example: 'true'
},
Process: {
type: 'object',
properties: {
id: {
$ref: '#/components/schemas/id'
},
name: {
$ref: '#/components/schemas/name'
},
displayName: {
$ref: '#/components/schemas/displayName'
},
version: {
$ref: '#/components/schemas/version'
},
enabled: {
$ref: '#/components/schemas/enabled'
}
}
},
Processes: {
type: 'object',
properties: {
Process: {
type: 'array',
items: {
$ref: '#/components/schemas/Process'
}
}
}
},
Error: {
type: 'object',
properties: {
message: {
type: 'string'
},
internal_code: {
type: 'string'
}
}
}
},
securitySchemes: {
ApiKeyAuth: {
type: 'apiKey',
in: 'header',
name: 'x-api-key'
}
}
}
}
v. Document API paths:
Paths are the endpoints that the API accesses. In the paths, we can define the route to extract the desired output and the HTTP methods to manipulate the paths, such as GET, POST, or DELETE. Here, the path is defined to the route to get the list of the processes, specifically processes using query parameters.
-
Inside the docs folder, create a file called paths.js and define it as shown below.
module.exports = {
paths: {
'/API/bpm/process': {
get: {
tags: ['Process operations'],
description: 'Do filters on processes',
operationId: 'filterProcesses',
parameters: [
{
name: 'name',
in: 'query',
schema: {
$ref: '#/components/schemas/name'
},
required: false,
description: 'Filter by process name'
},
{
name: 'displayName',
in: 'query',
schema: {
$ref: '#/components/schemas/displayName'
},
required: false,
description: 'Filter by process display name'
},
{
name: 'version',
in: 'query',
schema: {
$ref: '#/components/schemas/version'
},
required: false,
description: 'Filter by process version'
}
],
responses: {
'200': {
description: 'Successful operation.',
content: {
'application/json': {
schema: {
$ref: '#/components/schemas/Process'
}
}
}
},
'404': {
description: 'Not found',
content: {
'application/json': {
schema: {
$ref: '#/components/schemas/Error'
}
}
}
}
}
}
}
}
}
Add a new path to get a process by id.
module.exports = {
paths: {
'/API/bpm/process/{id}': {
get: {
tags: ['Process operations'],
description: 'Get a process by id',
operationId: 'getProcessById',
parameters: [
{
name: 'id',
in: 'path',
schema: {
$ref: '#/components/schemas/id'
},
required: true,
description: 'Get process by id'
}
],
responses: {
'200': {
description: 'Successful operation.',
content: {
'application/json': {
schema: {
$ref: '#/components/schemas/Process'
}
}
}
},
'404': {
description: 'Not found.',
content: {
'application/json': {
schema: {
$ref: '#/components/schemas/Error'
}
}
}
}
}
}
}
}
}
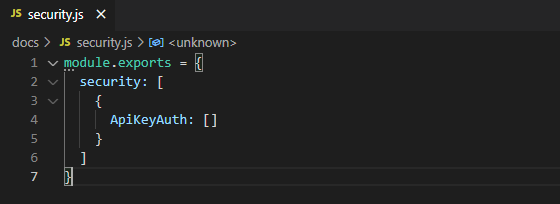
vi. Document security:
Security offers the possibility to add authentication in our API. It lets us define API protection using different security schemes, such as http, apiKey, oauth2, and openIdConnect. Since we have defined the use of an apiKey type for the authentication in securitySchemes while creating components, let’s apply the security now.
-
Inside the docs folder, create a file called security.js and define it as shown below.
Import modules
After documenting the API, we now need to import all the documented modules into the application.
-
Into the app.js, import all the documented modules as shown in the image below.
Results
Finally, it’s time to see the result of our hard work.
-
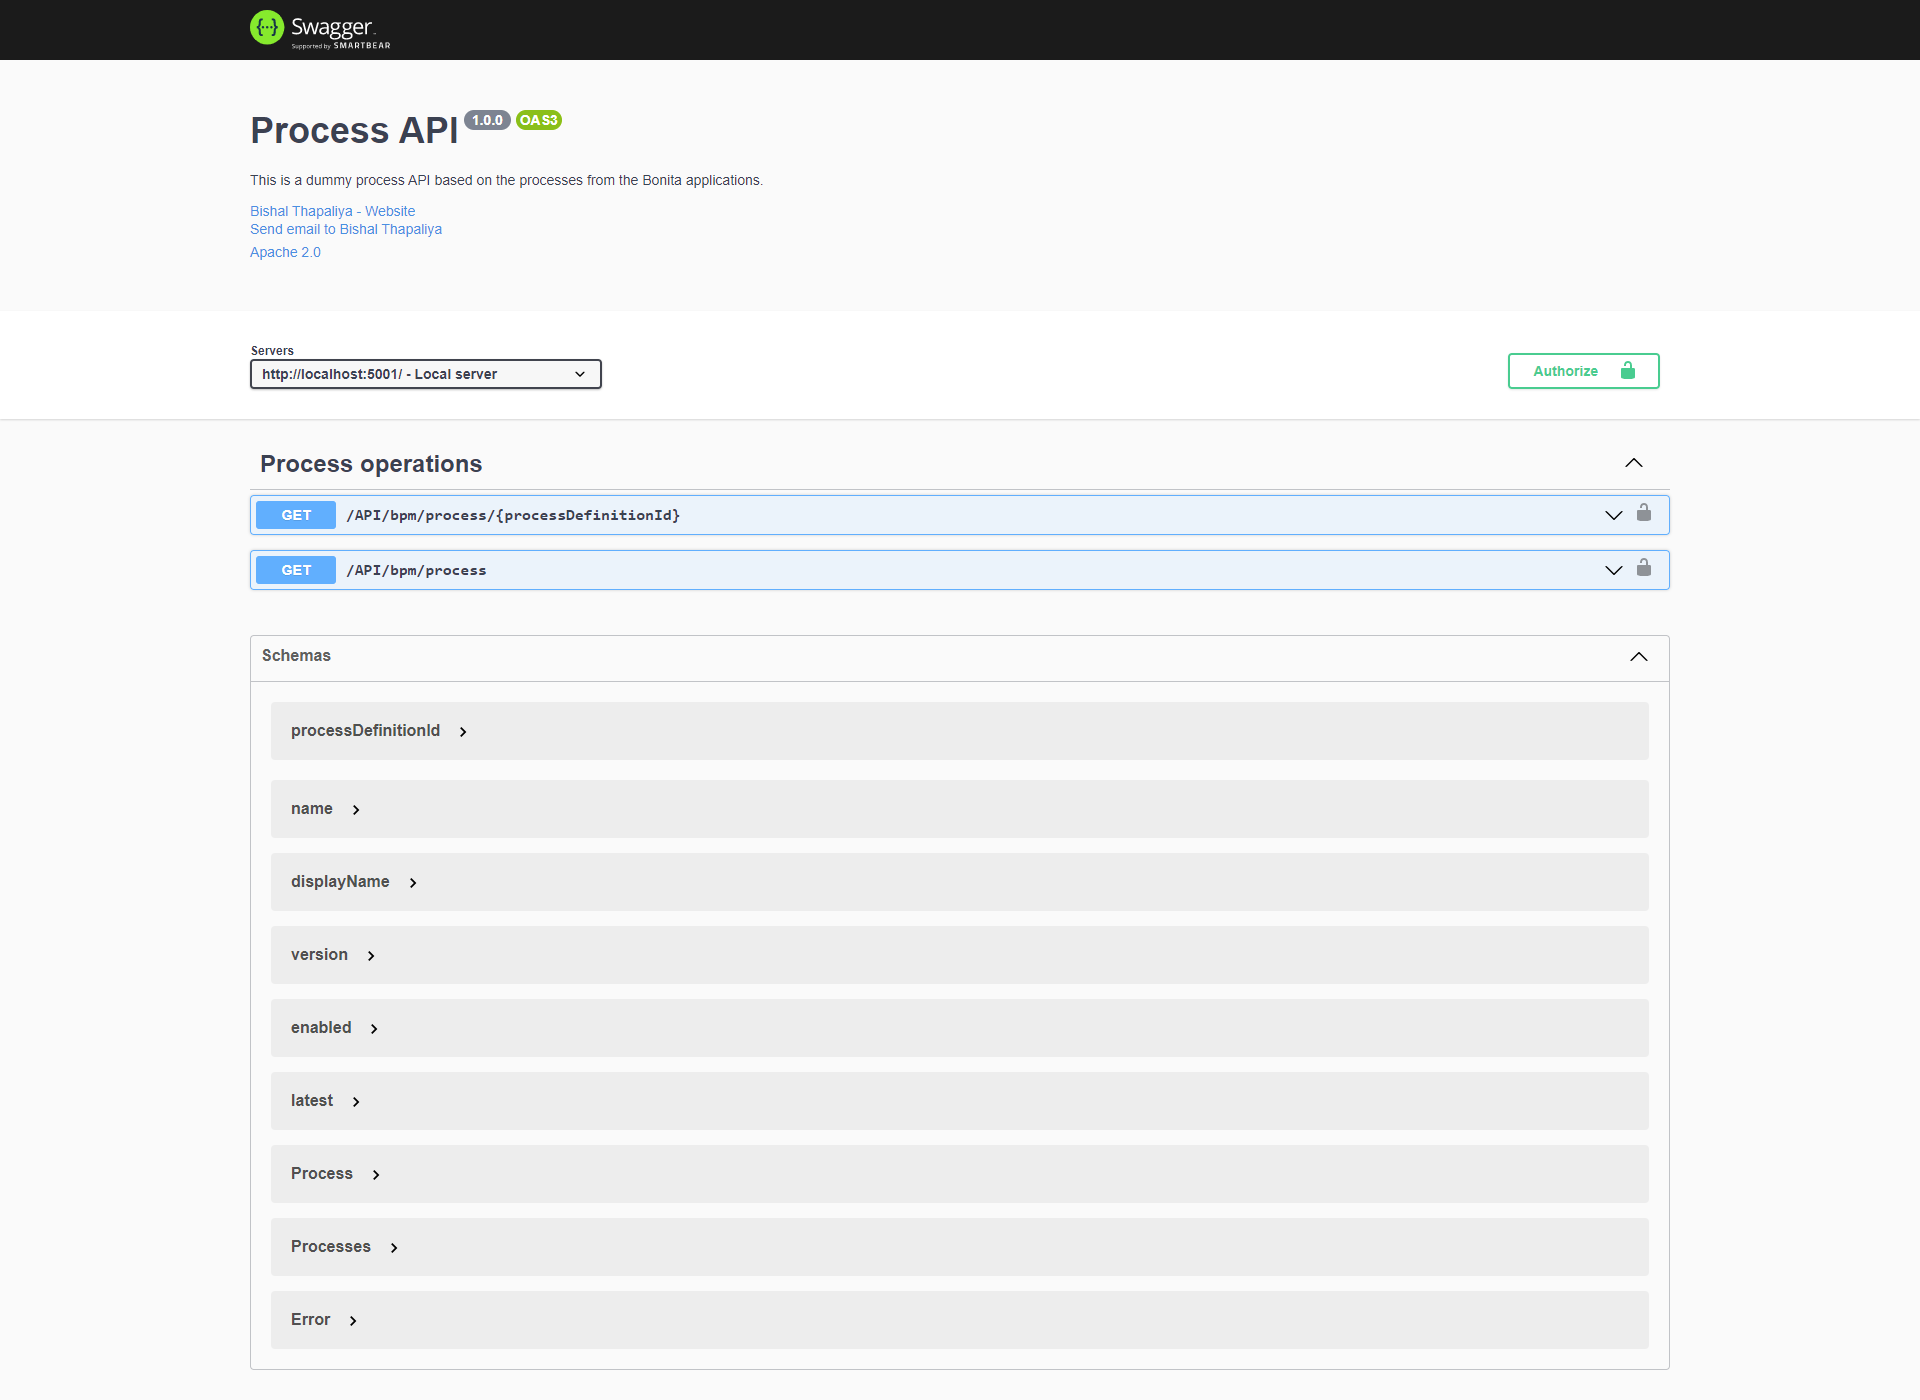
Execute the nodemon start command (if the server is stopped) and go to ‘localhost:3000/api-docs’. We can see that all the API information is documented and presented on the browser. We can try to execute the API by providing the correct query parameters to it.
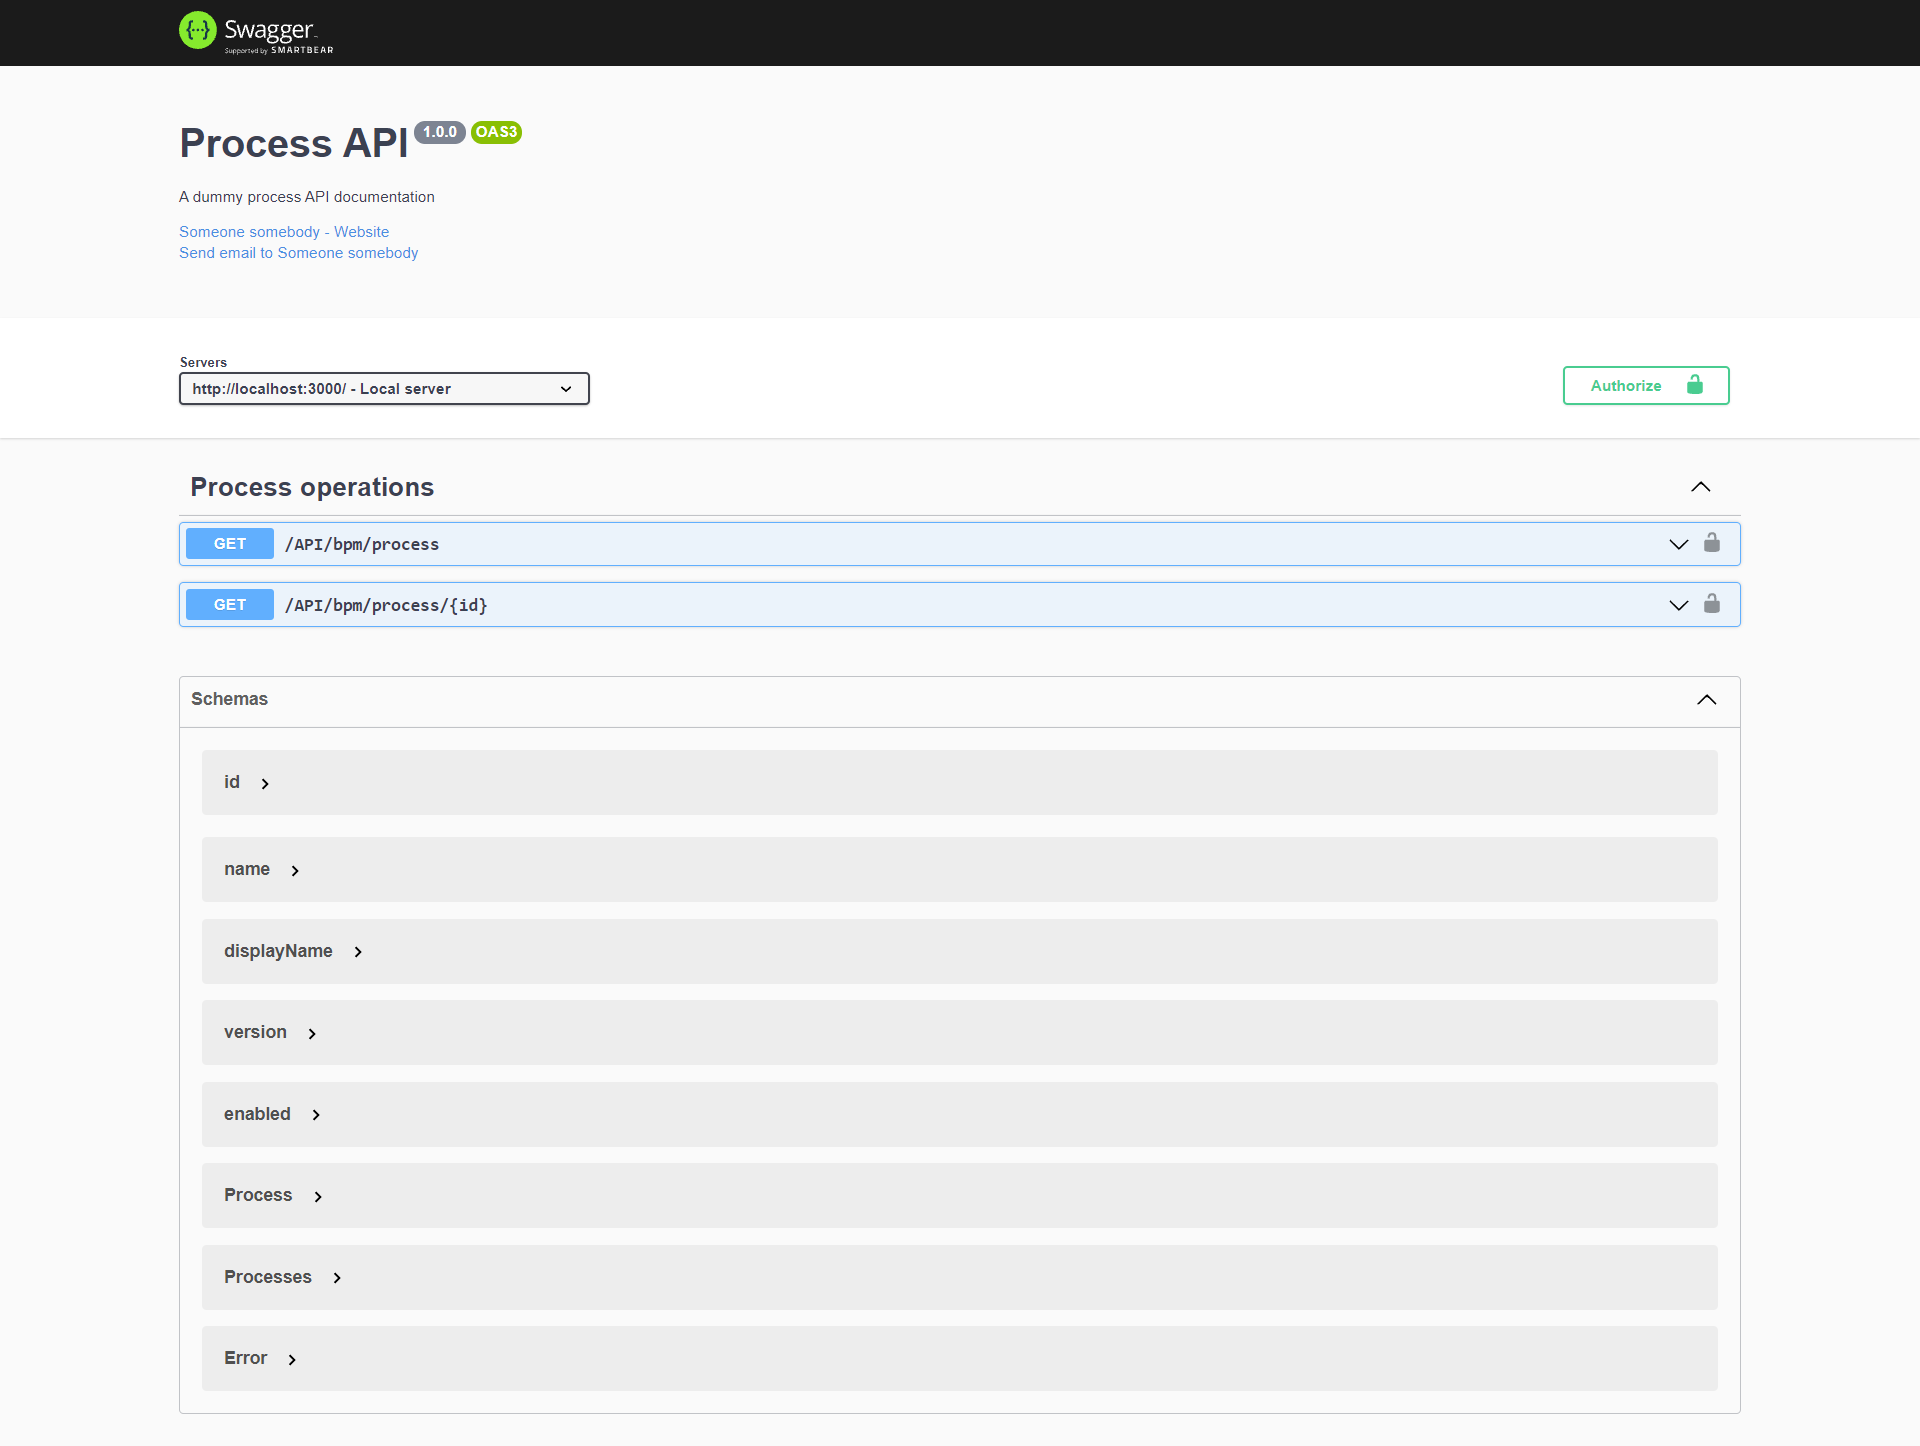
Image: Process API Documentation
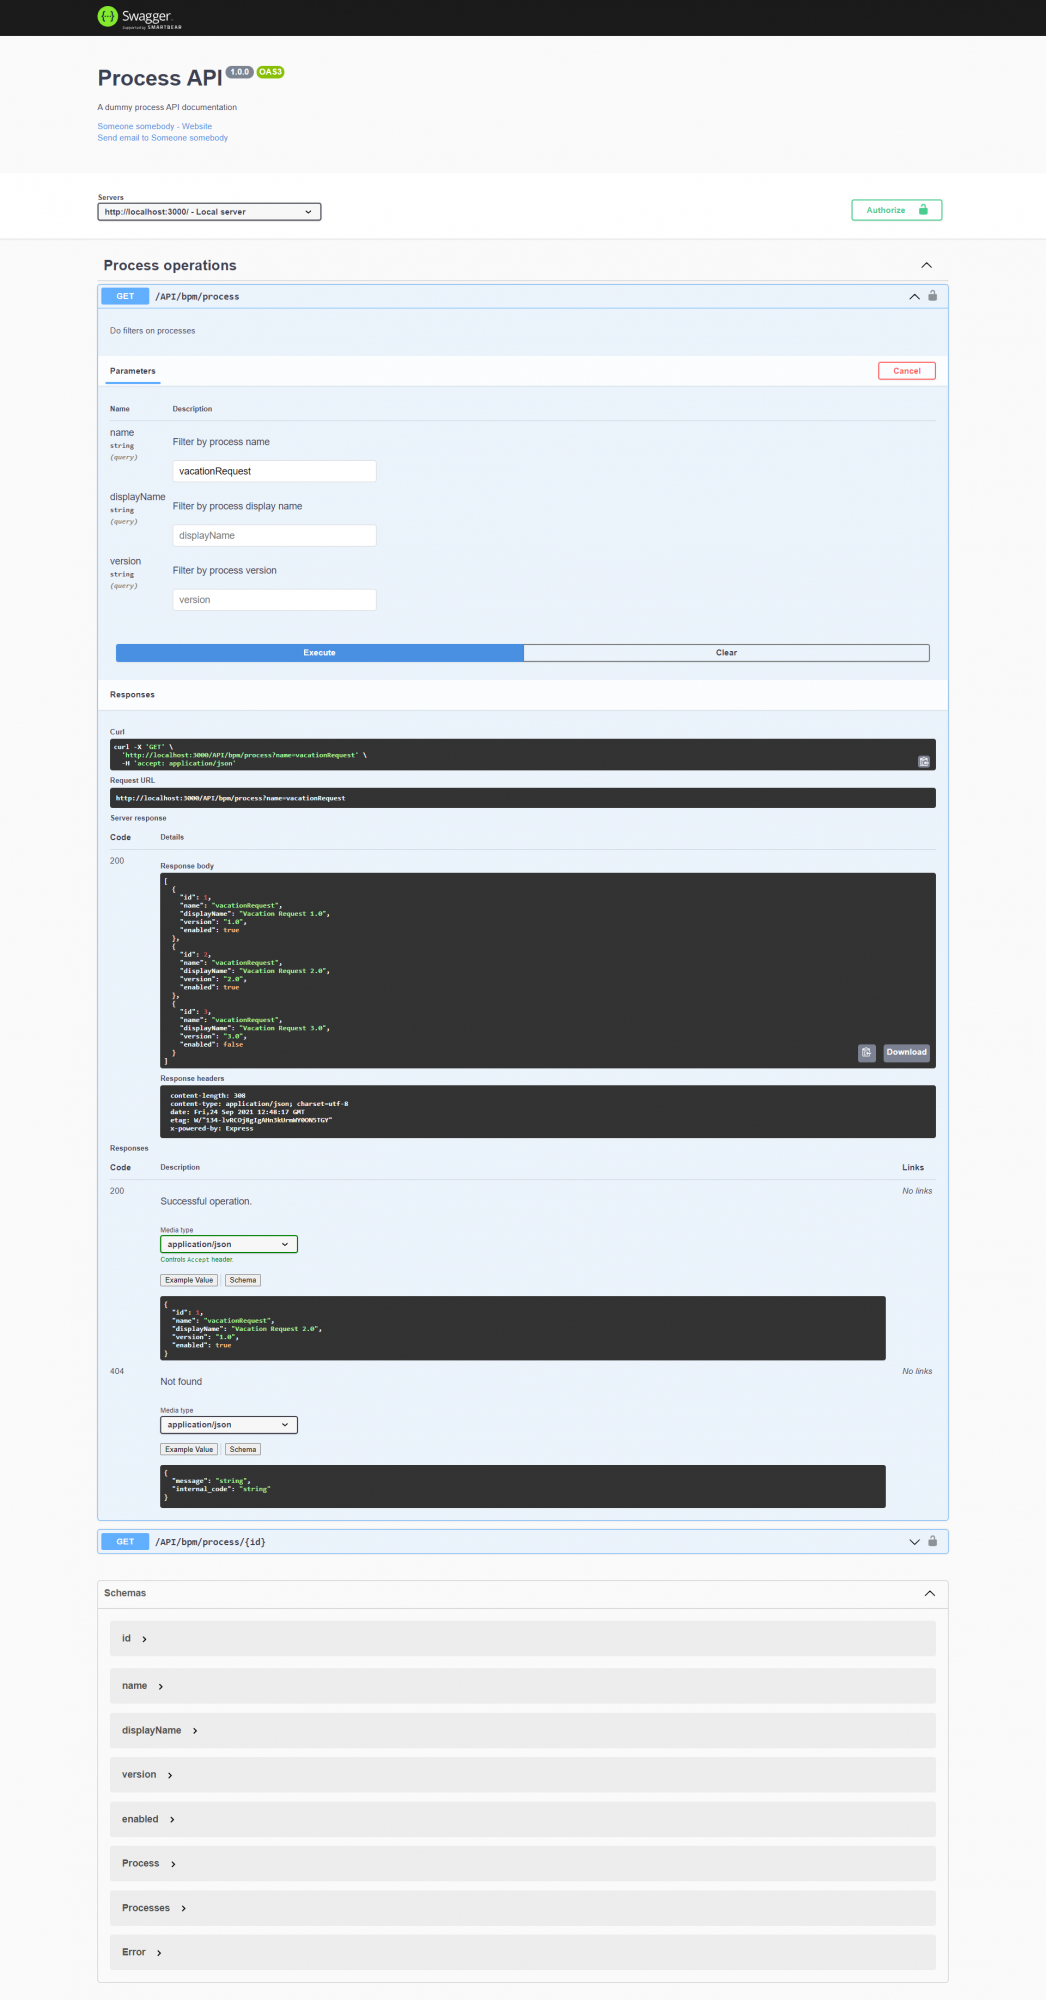
Image: Process by Id Documentation
Conclusion
I’ve stepped into building a REST API with Node.js and Express, and documenting it with Swagger (OpenAPI), and explained what I did via the steps mentioned above. Feel free to send me your feedback, suggestions, or solutions if you have any.
Thank you for reading.