Enhance your Bonita applications with Apache Camel
The Apache Camel community recently announced the release of the version 2.19.0 of their product, and I'm excited to say that it includes the very first version of the Bonita component! I wanted to take this opportunity to write a post to explain how to use this component.
I. Introduction to Apache Camel
If you are not familiar with Apache Camel, it's an open source integration framework, sometimes known as a lightweight ESB. It basically proposes a standard way to integrate different applications/technologies, which is truly powerful in today’s world where companies have to continuously deal with legacy application integration issues. One of my client projects, a US insurance company, actually used Camel to integrate an enterprise scanner application with Bonita. If you’re interested in this use case, you can learn more about it in this webinar. Also, if you want to get more details about Apache Camel in general, I recommend this article.
II. Email attachment categorization application
To illustrate the usage of the Bonita Camel component, I will detail the implementation of an application that helps users to categorize documents they receive by email and store them in the Enterprise ECM. Below is a high-level view of the application behavior.
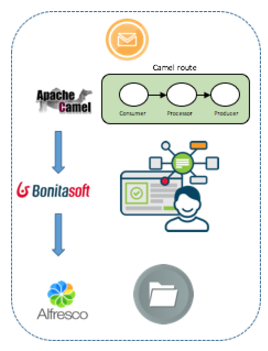
A Camel route listens and filters incoming emails, then triggers new cases in Bonita using data collected from the email. Bonita assigns a task to the user, then the user connects to the Bonita Portal to visualize the email attachment and choose an option to categorize it. On task submission, Bonita pushes the document and the selected category information to Alfresco.
In addition to this step-by-step tutorial, you can also find the application implemented on GitHub.
III. Application components configuration
To build this application, we use the following components:
- Bonita BPM 7.4.3
- Apache Camel 2.19.0
- Alfresco 5.2.0
a. Bonita BPM Configuration
We use Bonita Studio to design and implement the process for our application. The Bonita Studio includes an embedded Bonita Portal where the developer can deploy the application and test it.
- Download Bonita Studio here.
- Follow the instructions to install and launch the Studio.
b. Apache Camel application
There are multiple ways to build a Camel application. In this case we’re going to use a Maven archetype to build a web app that runs the Camel route.
- You need to have Maven installed on your machine. If not, you can download it from here.
- Open a terminal and run the following command to create a Camel web project:
mvn archetype:generate -DarchetypeGroupId=org.apache.camel.archetypes -DarchetypeArtifactId=camel-archetype-web -DarchetypeVersion=2.19.0 -DgroupId=org.bonitasoft.demo.esb -DartifactId=camel-bonita-demo - When requested for the Version (1.0-Snapshot) and Confirmation (Y), just press Enter.
- When the execution is done, a new folder "camel-bonita-demo" will be created.
- Go to camel-bonita-demo.
- Start the embedded Jetty server on the port 9000. You can change this port according to your environment.
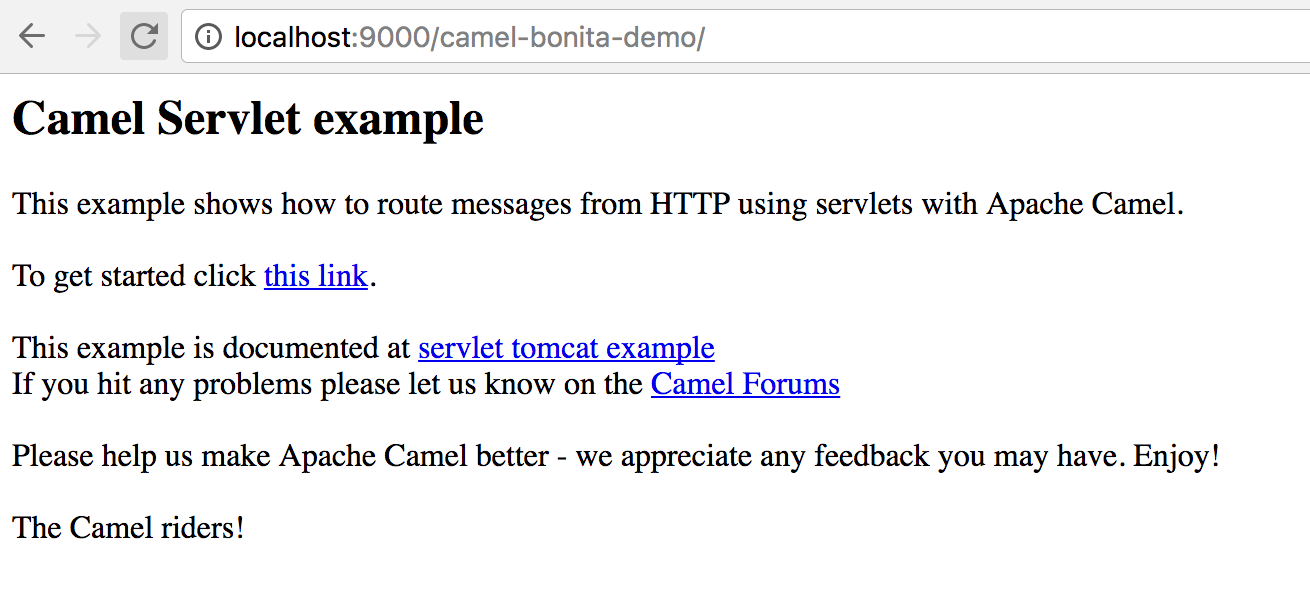
mvn jetty:run -Djetty.port=9000 - Open a browser and navigate to http://localhost:9000/camel-bonita-demo. You should see the following page if the installation is correct.
III. Alfresco
To quickly get an instance of Alfresco running, I use a Docker image. If you don’t have Docker installed on your machine, you can either install Docker or get a standalone version of Alfresco.
- Download the Docker image for Alfresco.
docker pull gui81/alfresco - Run the docker image.
docker run --name='alfresco' -it -p 9080:8080 gui81/alfresco - Wait for a few minutes for the container to start.
- Open a browser and navigate to http://localhost:9080
- Login using the default credentials:
- Username: admin
- Password: admin
- Go to My Files
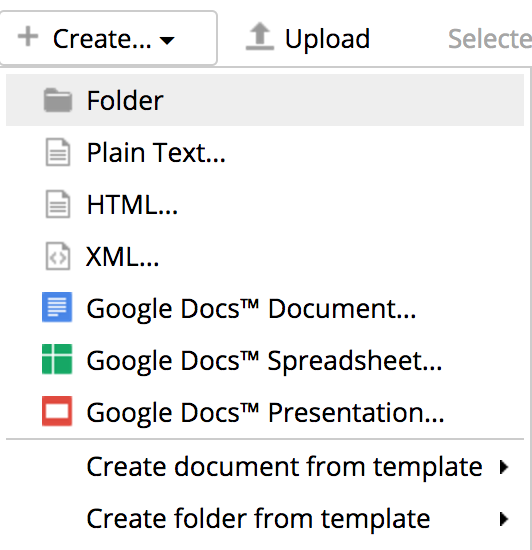
- Click on Create and select Folder.
- Enter "Demo" for the folder name and title.
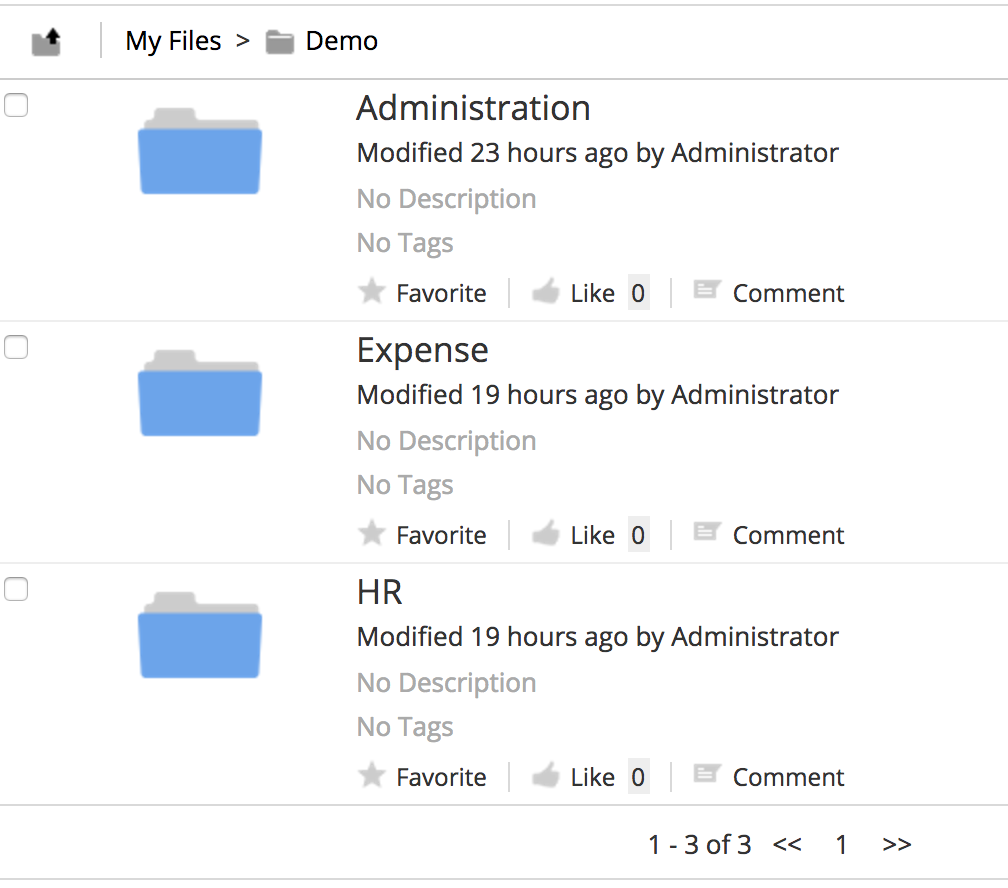
- Create three folders in Demo folder with the following names:
- HR
- Administration
- Expense
- You should have the following now in your Demo folder:
IV. Application implementation
Now, we have all the components correctly deployed, so we’re going to implement our application. First, we need to create a process with Bonita Studio that will take a document as input and have a human task where a user can select a category for this document. Then, we will implement a Camel application that listen for incoming emails, extract information from this email and trigger a new case in Bonita.
a. Bonita process
Using the Bonita Studio, we can implement the process and test it locally.
- Open Bonita Studio.
- Click on New to create a new process.
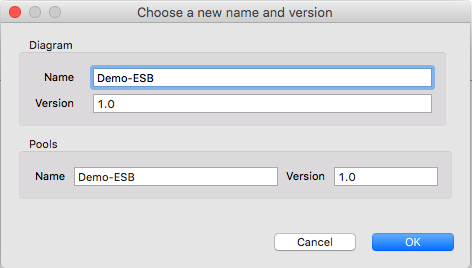
- Set the diagram and process name:
- Click on Diagram => Rename… from the top menu
- Enter "Demo-ESB" and the diagram name and pool name
- Rename the human task "Step1" to “Select a category”.
- Select the human task from the diagram
- Navigate to General => General tab and enter the new name
Add a Service task named "Send document to Alfresco".
- Select the human task "Select a category" from the diagram
Perform a drag and drop from the contextual task icon
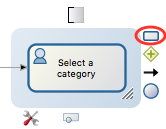
Rename the task created to "Send document to Alfresco"
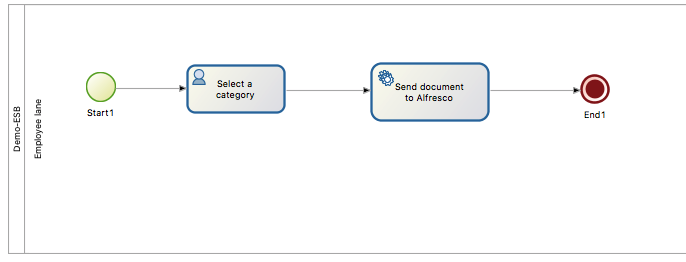
- Add an End event
- Select the task "Send document to Alfresco" from the diagram
- Drag and drop an End event from the contextual event icon
- The diagram should look like this:
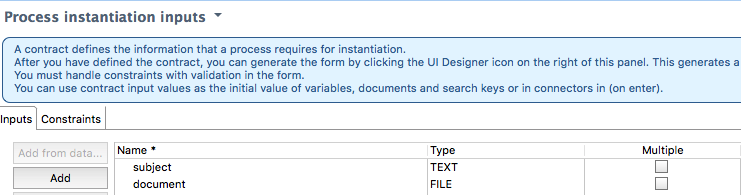
Define an instantiation contract with one Text input "subject" and one File input “document”
- Select the Pool
- Go to Execution => Contract
- Click on Add, name the new input "subject". Select the Type “Text”
- Click on Add, name the new input "document". Select the Type “File”
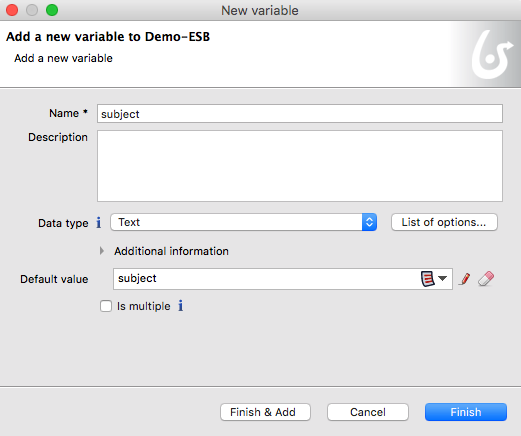
Add one Text process variable "subject" with the default value initialized from the contract.
- Select the Pool
- Go to Data => Pool variables
- On the right panel "Process variables", click on Add
- Enter "subject" in the Name field. Select “Text” in Data type
- Select the contract value "subject" from the dropdown list for the Default value field
- Click on Finish
Add one Text process variable "category" with no default value. It will be used in the process to store the category selected by the user.
Add one Document variable "attachment" using the contract value.
- Select the Pool
- Go to Data = > Documents
- Click on Add, enter "attachment" in the name field.
- Choose the option "From contract" and select the value “document”
- Click on Finish
Define a step contract on the human task "Select a category" with one Text input “category”.
- Select the task "Select a category"
- Go to Execution => Contract
- Click on Add and rename the input to "category". Select the type “Text”
Add an Operation to store the category selected by the user.
- Select the task "Select a category"
- Go to Execution => Operation
- Click on Add. Select the variable category on the left dropdown list. Select the contract variable "category" on the right dropdown list (Make sure to select the contract variable and not the process variable).
To overcome a bug in the attachment sent by Camel component, we need to update the attachment mime type.
Select the task "Select a category"
Go to Execution => Operation
Click on Add. Select "attachment" on the left dropdown list. Click on the pencil icon of the right dropdown and select Script. Name the script updateMimeType and enter the following code:
import org.bonitasoft.engine.bpm.contract.FileInputValue;
import org.bonitasoft.engine.bpm.document.Document;
import org.bonitasoft.engine.bpm.document.DocumentValue;
Document currentDocument = apiAccessor.processAPI.getLastDocument(processInstanceId, "attachment")
MimetypesFileTypeMap mimetypesFileTypeMap = new MimetypesFileTypeMap();
String contentType = mimetypesFileTypeMap.getContentType(currentDocument.contentFileName);
DocumentValue fileInputValue = new DocumentValue(apiAccessor.processAPI.getDocumentContent(currentDocument.contentStorageId), contentType, currentDocument.contentFileName);
return fileInputValue
Add a form on the human task "Select a category". This is the form that will be used by the end user to select the document category.
Select the task "Select a category"
Go to Execution => Form
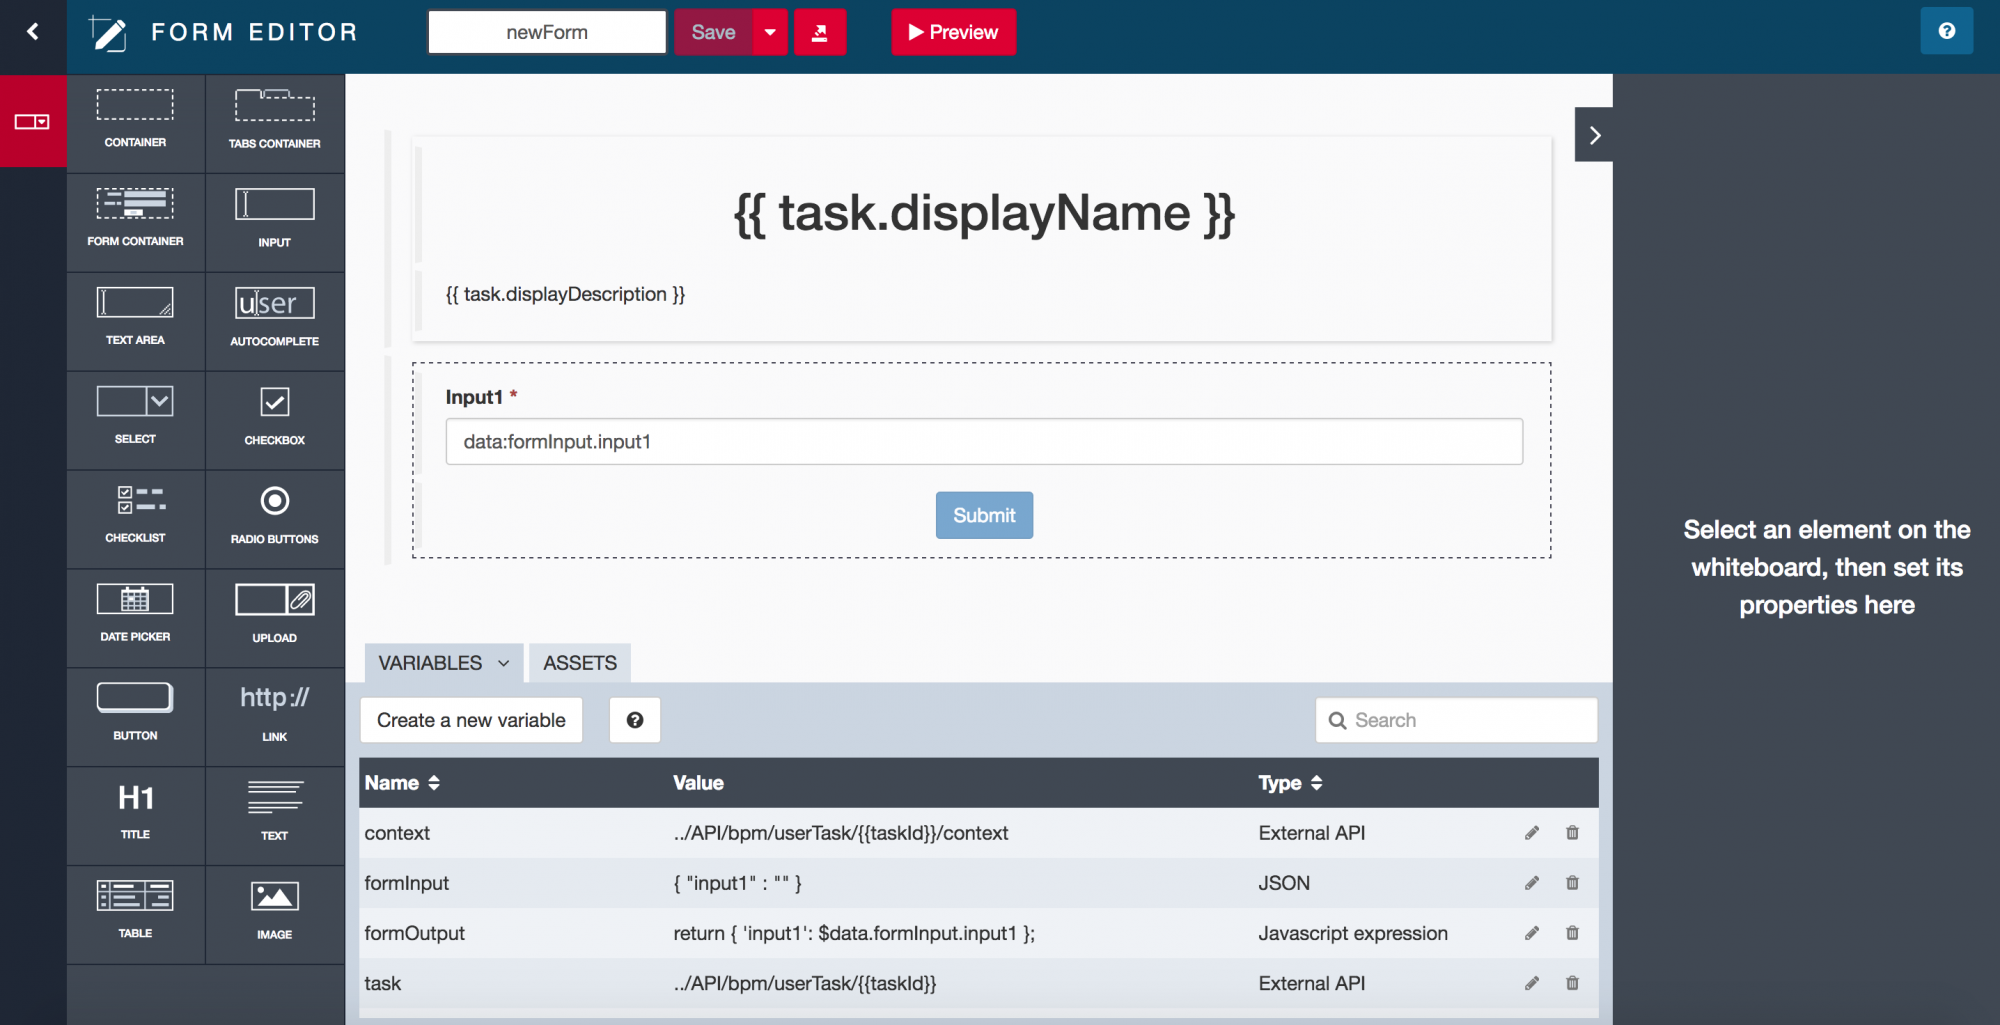
On the target form field, click on the pencil
 to open the UI Designer. The browser will open and display this page
- Rename the form to "selectCategory"
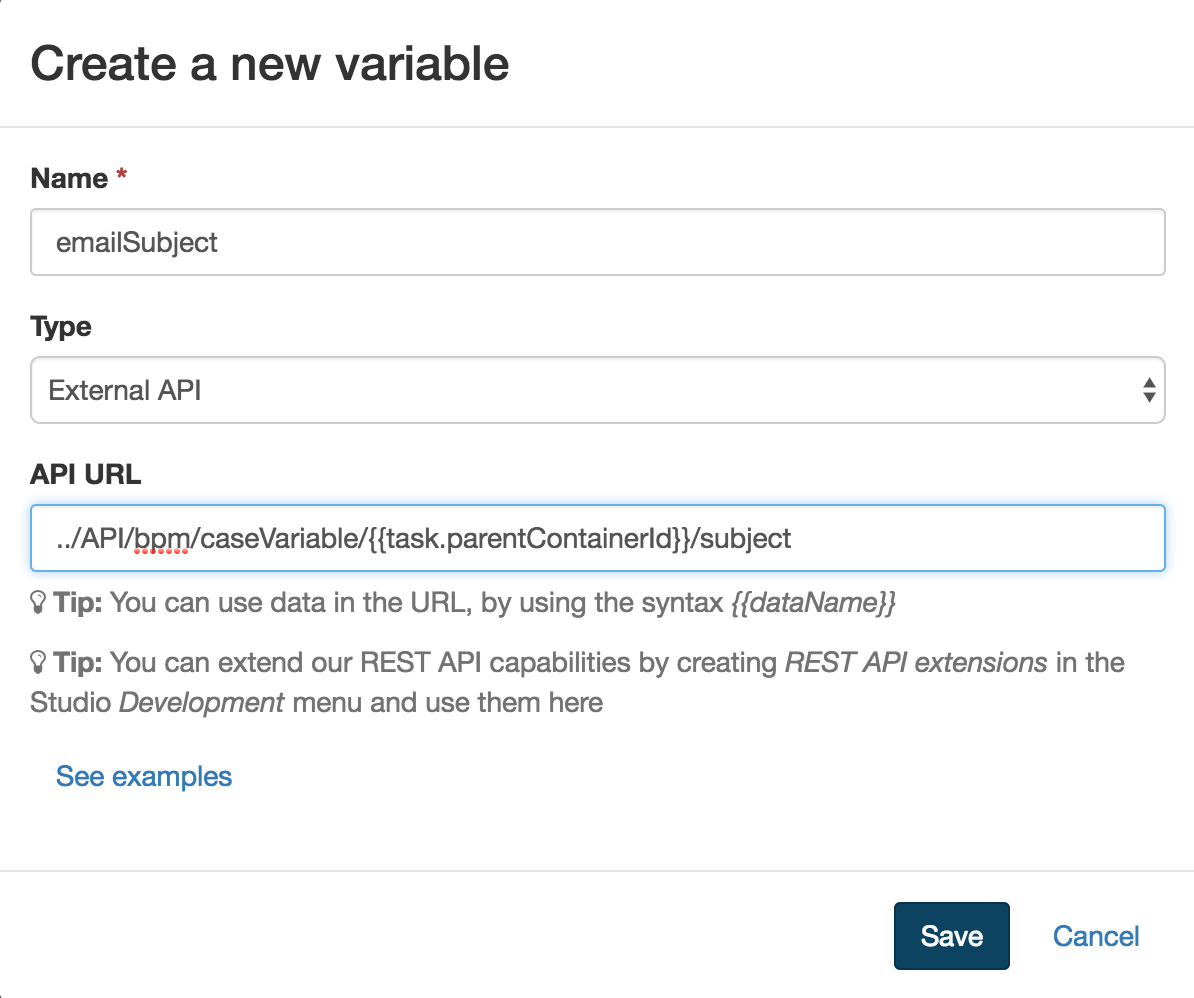
- Add a variable to retrieve the value of the process variable "subject"
- Click on Create a new variable
- Enter emailSubject in the field Name
- Select External API in the field Type
- In the field API URL enter: ../API/bpm/caseVariable/{{task.parentContainerId}}/subject
- Click on Save
- Add a variable to retrieve the document.
- Click on Create a new variable
- Enter attachment in the field Name
- Select External API in the field Type
- In the field API URL enter:
../API/bpm/caseDocument?p=0&c=10&f=name=attachment - Click on Save
- Add a Text widget to display the email subject.
- Drag and drop the Text widget from the palette to the page above the Input widget
- On the left panel, locate the attribute Text. Replace the existing value with: You have a new email with the subject:
{{emailSubject.value}}
- Add a link to download the document.
- Drag and drop the Link widget from the palette to the page below the Text widget
- Replace the Text attribute value "Link" with“Email attachment”
- Click on the FX icon
 on the URL attribute, and enter the following value:
 "/bonita/portal/" + attachment[0].url
- Replace the input widget with a dropdown list.
- Select the existing input widget "Input1" and delete it
- Drag and drop a Select widget from the palette
- Replace the Label attribute value with "Select a category"
- Click the FX icon on the Available values attribute and enter:
["HR", "Administration", "Expense"] - On the attribute Value, enter:
formOutput.category
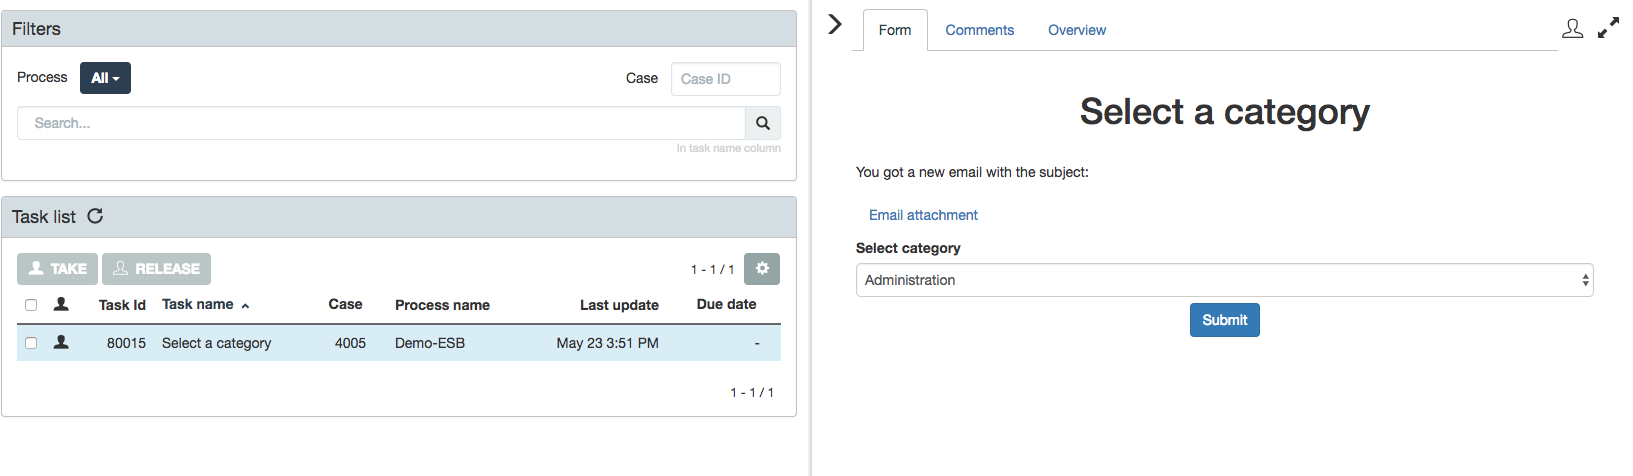
- The form should look like this:
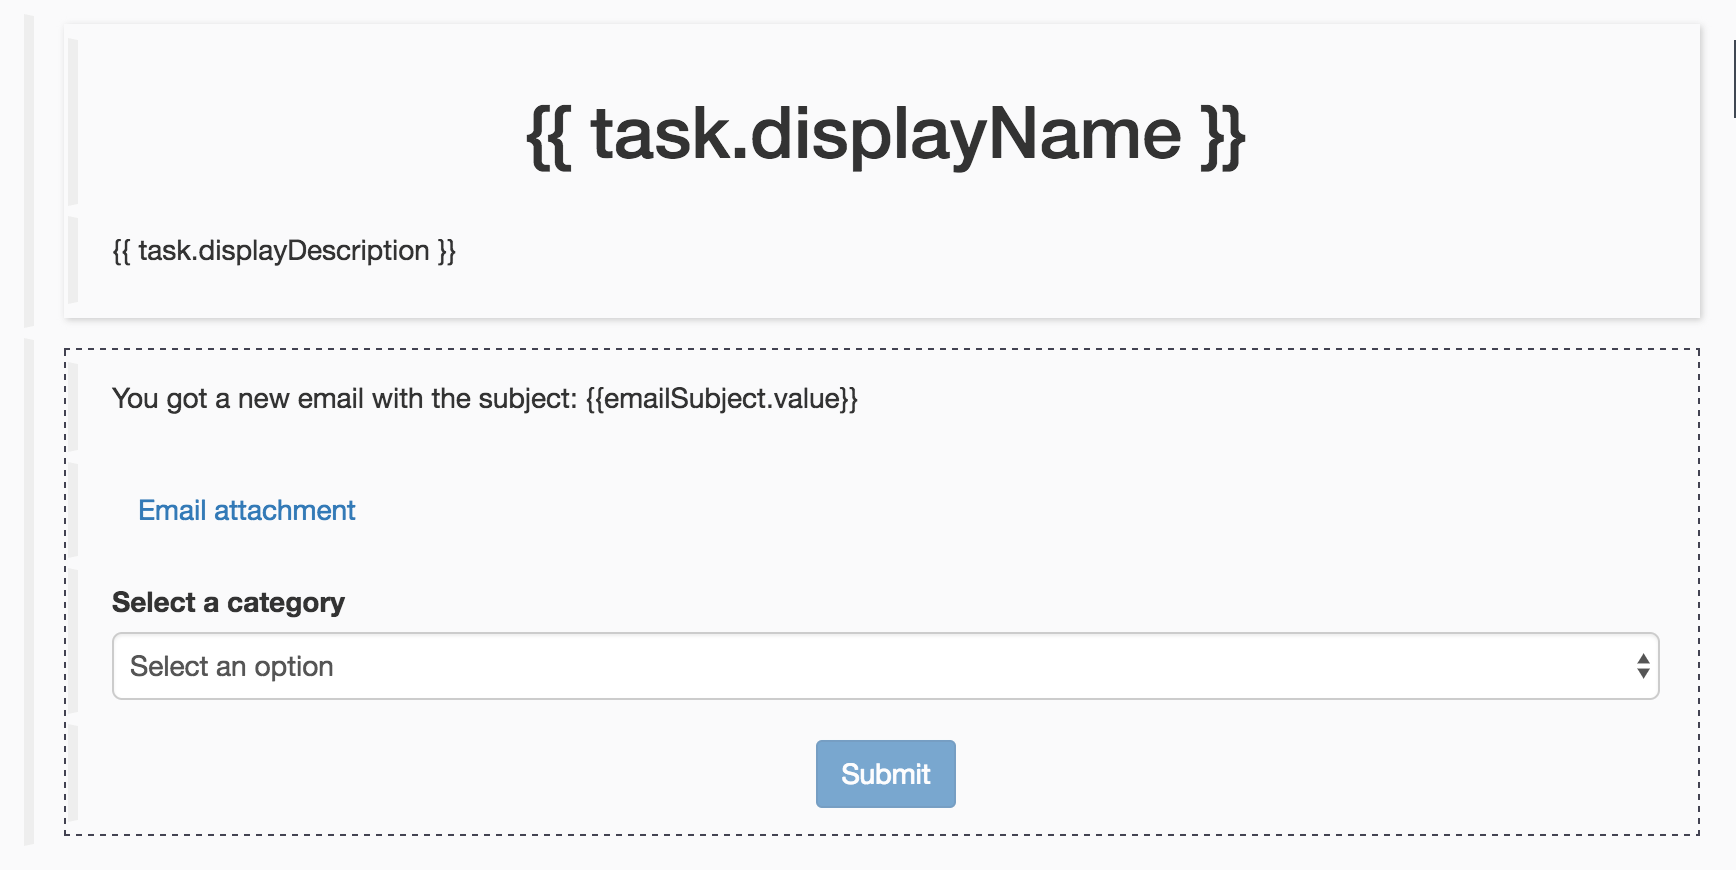
- Don’t forget to Save the form before closing the UI Designer
- Add a connector to send document to Alfresco.
- Go back to the Studio
- Select the task "Send document to Alfresco"
- Go to Execution => Connectors in
- Click on Add, select the connector CMIS "Upload a document"
- Enter "uploadDocument" in the name field and click on Next
- Enter "admin" in the Username field
- Enter "admin" in the Password field
- Enter "-default-" in the Repository Name field
- Choose "atompub" for the Binding type field
- In the field Atom URL, enter http://localhost:9080/alfresco/api/-default-/public/cmis/versions/1.1/atom

- Click on Next
- Choose the variable "attachment" for the Document name field
- In the field Parent folder, click on the Pencil icon to open the expression editor.
- Choose Script and enter: return "/Demo/" + category
- Click on OK
- In the field Destination name, click on the Pencil icon to open the expression editor
- Choose Script and enter: attachment.fileName
- Click on OK
- Click on Finish
At this point the process is complete. You can try it by clicking on the Run button which will deploy the process in the local Bonita Portal and open a browser to display the Start form. You can upload a document and enter a subject name to try the process. That will create a new case which will add one human task in your task list. You can open this task, select a category and submit it.
If everything works fine, you should see the document uploaded in your local Alfresco in the correct folder.
b. Camel application
Using the Maven archetype, we quickly implemented an example of a Camel application. Now, we’re going to modify this example to implement our application.
To implement the Camel application, I’m using Eclipse but you can use any text editor or development environment.
- Open Eclipse.
- Import the Maven project. File => Import => Existing Maven project. Click on Next.
- In the Root directory select the folder where the project camel-bonita-demo is located. Then click on Finish.
- In the new imported project, open the file pom.xml and add the following dependencies:
<groupId>org.apache.camel</groupId>
<artifactId>camel-bonita</artifactId>
</dependency>
<dependency>
<groupId>org.apache.camel</groupId>
<artifactId>camel-mail</artifactId>
</dependency>
- Create a class org.bonitasoft.demo.esb.ExtractFromMail and replace the code with the following:
import java.io.Serializable;
import java.util.HashMap;
import java.util.Map;
import javax.activation.DataHandler;
import org.apache.camel.Exchange;
import org.apache.camel.component.bonita.api.model.FileInput;
import org.springframework.stereotype.Service;
public class ExtractFromMail {
public void process(Exchange exchange) throws Exception {
// the API is a bit clunky so we need to loop
Map<String, DataHandler> attachments = exchange.getIn().getAttachments();
HashMap<String, Serializable> bonitaInput = new HashMap<String, Serializable>();
FileInput file = null;
if (attachments.size() > 0) {
for (String name : attachments.keySet()) {
DataHandler dh = attachments.get(name);
// get the file name
String filename = dh.getName();
// get the content and convert it to byte[]
byte[] data = exchange.getContext().getTypeConverter().convertTo(byte[].class, dh.getInputStream());
file = new FileInput(filename, data);
}
}
if (file != null) {
bonitaInput.put("document", file);
}
bonitaInput.put("subject", (String) exchange.getIn().getHeader("Subject"));
exchange.getOut().setBody(bonitaInput);
}
}
- Edit the file src/main/webapp/WEB-INF/applicationContext.xml.
- Within the tag camelContext, add a new route:
<from uri="imaps://<imapHost>:<imapPort>?username=<emailAccount>&password=<emailPassword>&searchTerm.unseen=true&searchTerm.subject=<emailSubject>" />
<to uri="extractFromMail" />
<to uri="log:org.bonitasoft.esb.demo?level=INFO" />
<to uri="bonita:startCase?hostname=<bonitaServerHost>&port=<bonitaServerPort>&processName=<processName>&username=<technicalUserName>&password=<technicalUserPassword>" />
</route>
- Replace the properties between <> with your values:
- imapHost: Hostname of your IMAP Server. Example for Gmail: imap.gmail.com
- imapHost: Port of your IMAP Server. Example for Gmail: 993
- emailAccount: Email account. Example: test.bonita@gmail.com
- emailPassword: Email account password
- emailSubject: Email subject that will trigger the route. For example: Demo
- bonitaServerHost: Hostname of your Bonita Portal. Example for local: localhost
- bonitaServerPort: Port of your Bonita Portal. By example: 8080
- processName: Name of the Bonita process to trigger. Example: Demo-ESB
- technicalUserName: Username of your Bonita technical user: For example: install
- technicalUserPassword: Password of your Bonita technical user: For example: install
- Comment out the route "helloRoute".
- Declare the bean extractFromMail.
- Below the end tag , add the following bean declaration:
<bean id="extractFromMail" class="org.bonitasoft.demo.esb.ExtractFromMail" />
- Below the end tag , add the following bean declaration:
You can run the Camel project with the following command: mvn jetty:run -Djetty.port=9000
The Camel application is now listening for incoming email sent to the email specified in the configuration.
V. Test the application
Before testing the application, make sure all the components are up and running on your machine:
- Alfresco
- Bonita Portal with the target process deployed
- Camel application
To test the application, send an email with an attachment that matches your Camel configuration. In my case, I sent an email to test.bonita@gmail.com with subject: Demo.
Wait for a few minutes for the Camel route to pick up the email and trigger a new case in Bonita. Then connect to the Bonita Portal to retrieve the new task. Take the task, select a category for the attachment, and submit the task.
Go to Alfresco in the folder corresponding to the selected category. The document should be there.
We saw how easy it is to build a complete application that integrate seamlessly different systems. Camel comes with a lot of components to connect to different applications. It's a really viable option to combine the power of integration brought by Camel with Bonita to build business applications.
That's all folks.
Comments
you are currently reading. Check out testimonials before you download your apps. click here Inspect the testimonials of other users to see if the apk
a few of usings the Musical.ly Online solution. musicallylogin Musically Online permits customers to communicate
Used or refurbished on ebay and also similar android tv box yet the Plus is the most powerful.
Used or refurbished on ebay and also similar android tv box yet the Plus is the most powerful.
Streams on Mobdro App. Mobdro Apk, Mobdro for Dubsmash Login Online dual click to set up. Now launch the Nox App Player.